
Feeling inspired by a recent video by Bob Clagett at I Like to Make Stuff, I decided to test my mettle and make my own ocean table. The project was not without adversity, but overall I'd say it was quite successful:
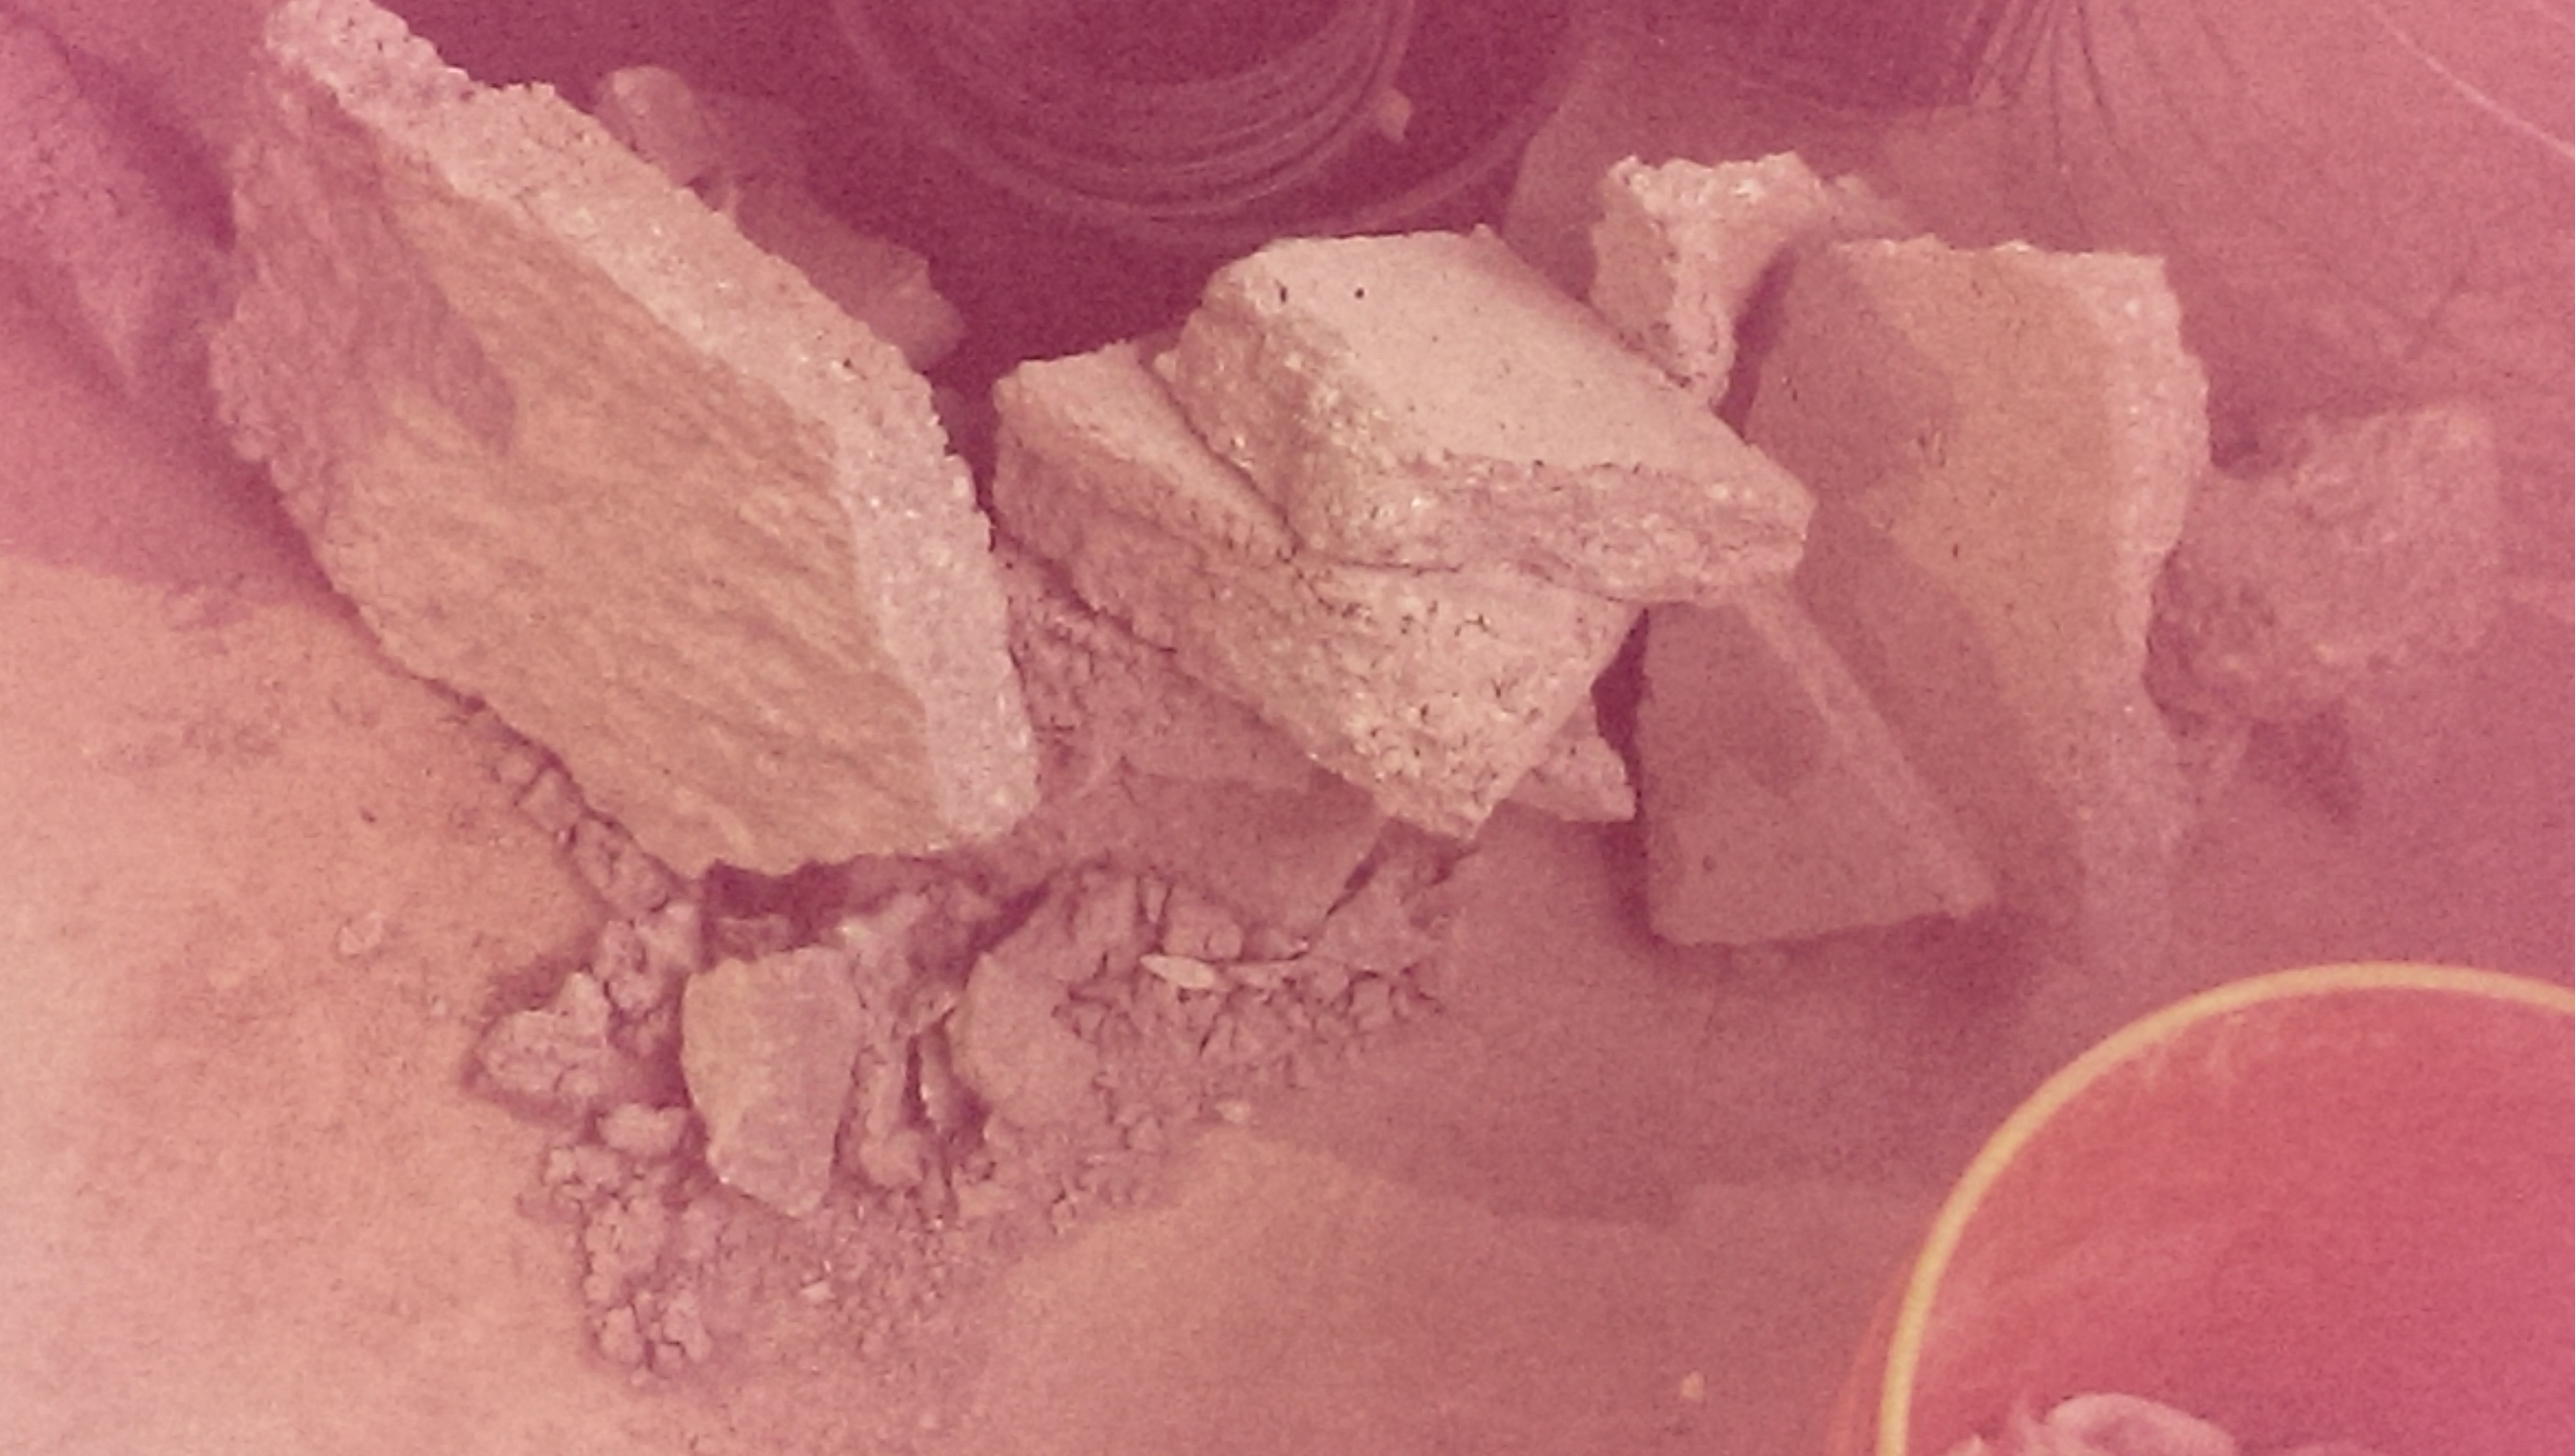
I followed a lot of the steps outlined by Bob in the video. I started with a melamine concrete mold roughly 2' square. I did not have the patience to order a bag of countertop concrete mix, so I went ahead and used Quikrete 5000. My first attempt, I didn't realize just how crazy 80 pounds of concrete is as a table top. I ended up turning this one into rubble:
Although Quikrete 5000 has aggregate in it, the end result of the successful pour was actually pretty nice:
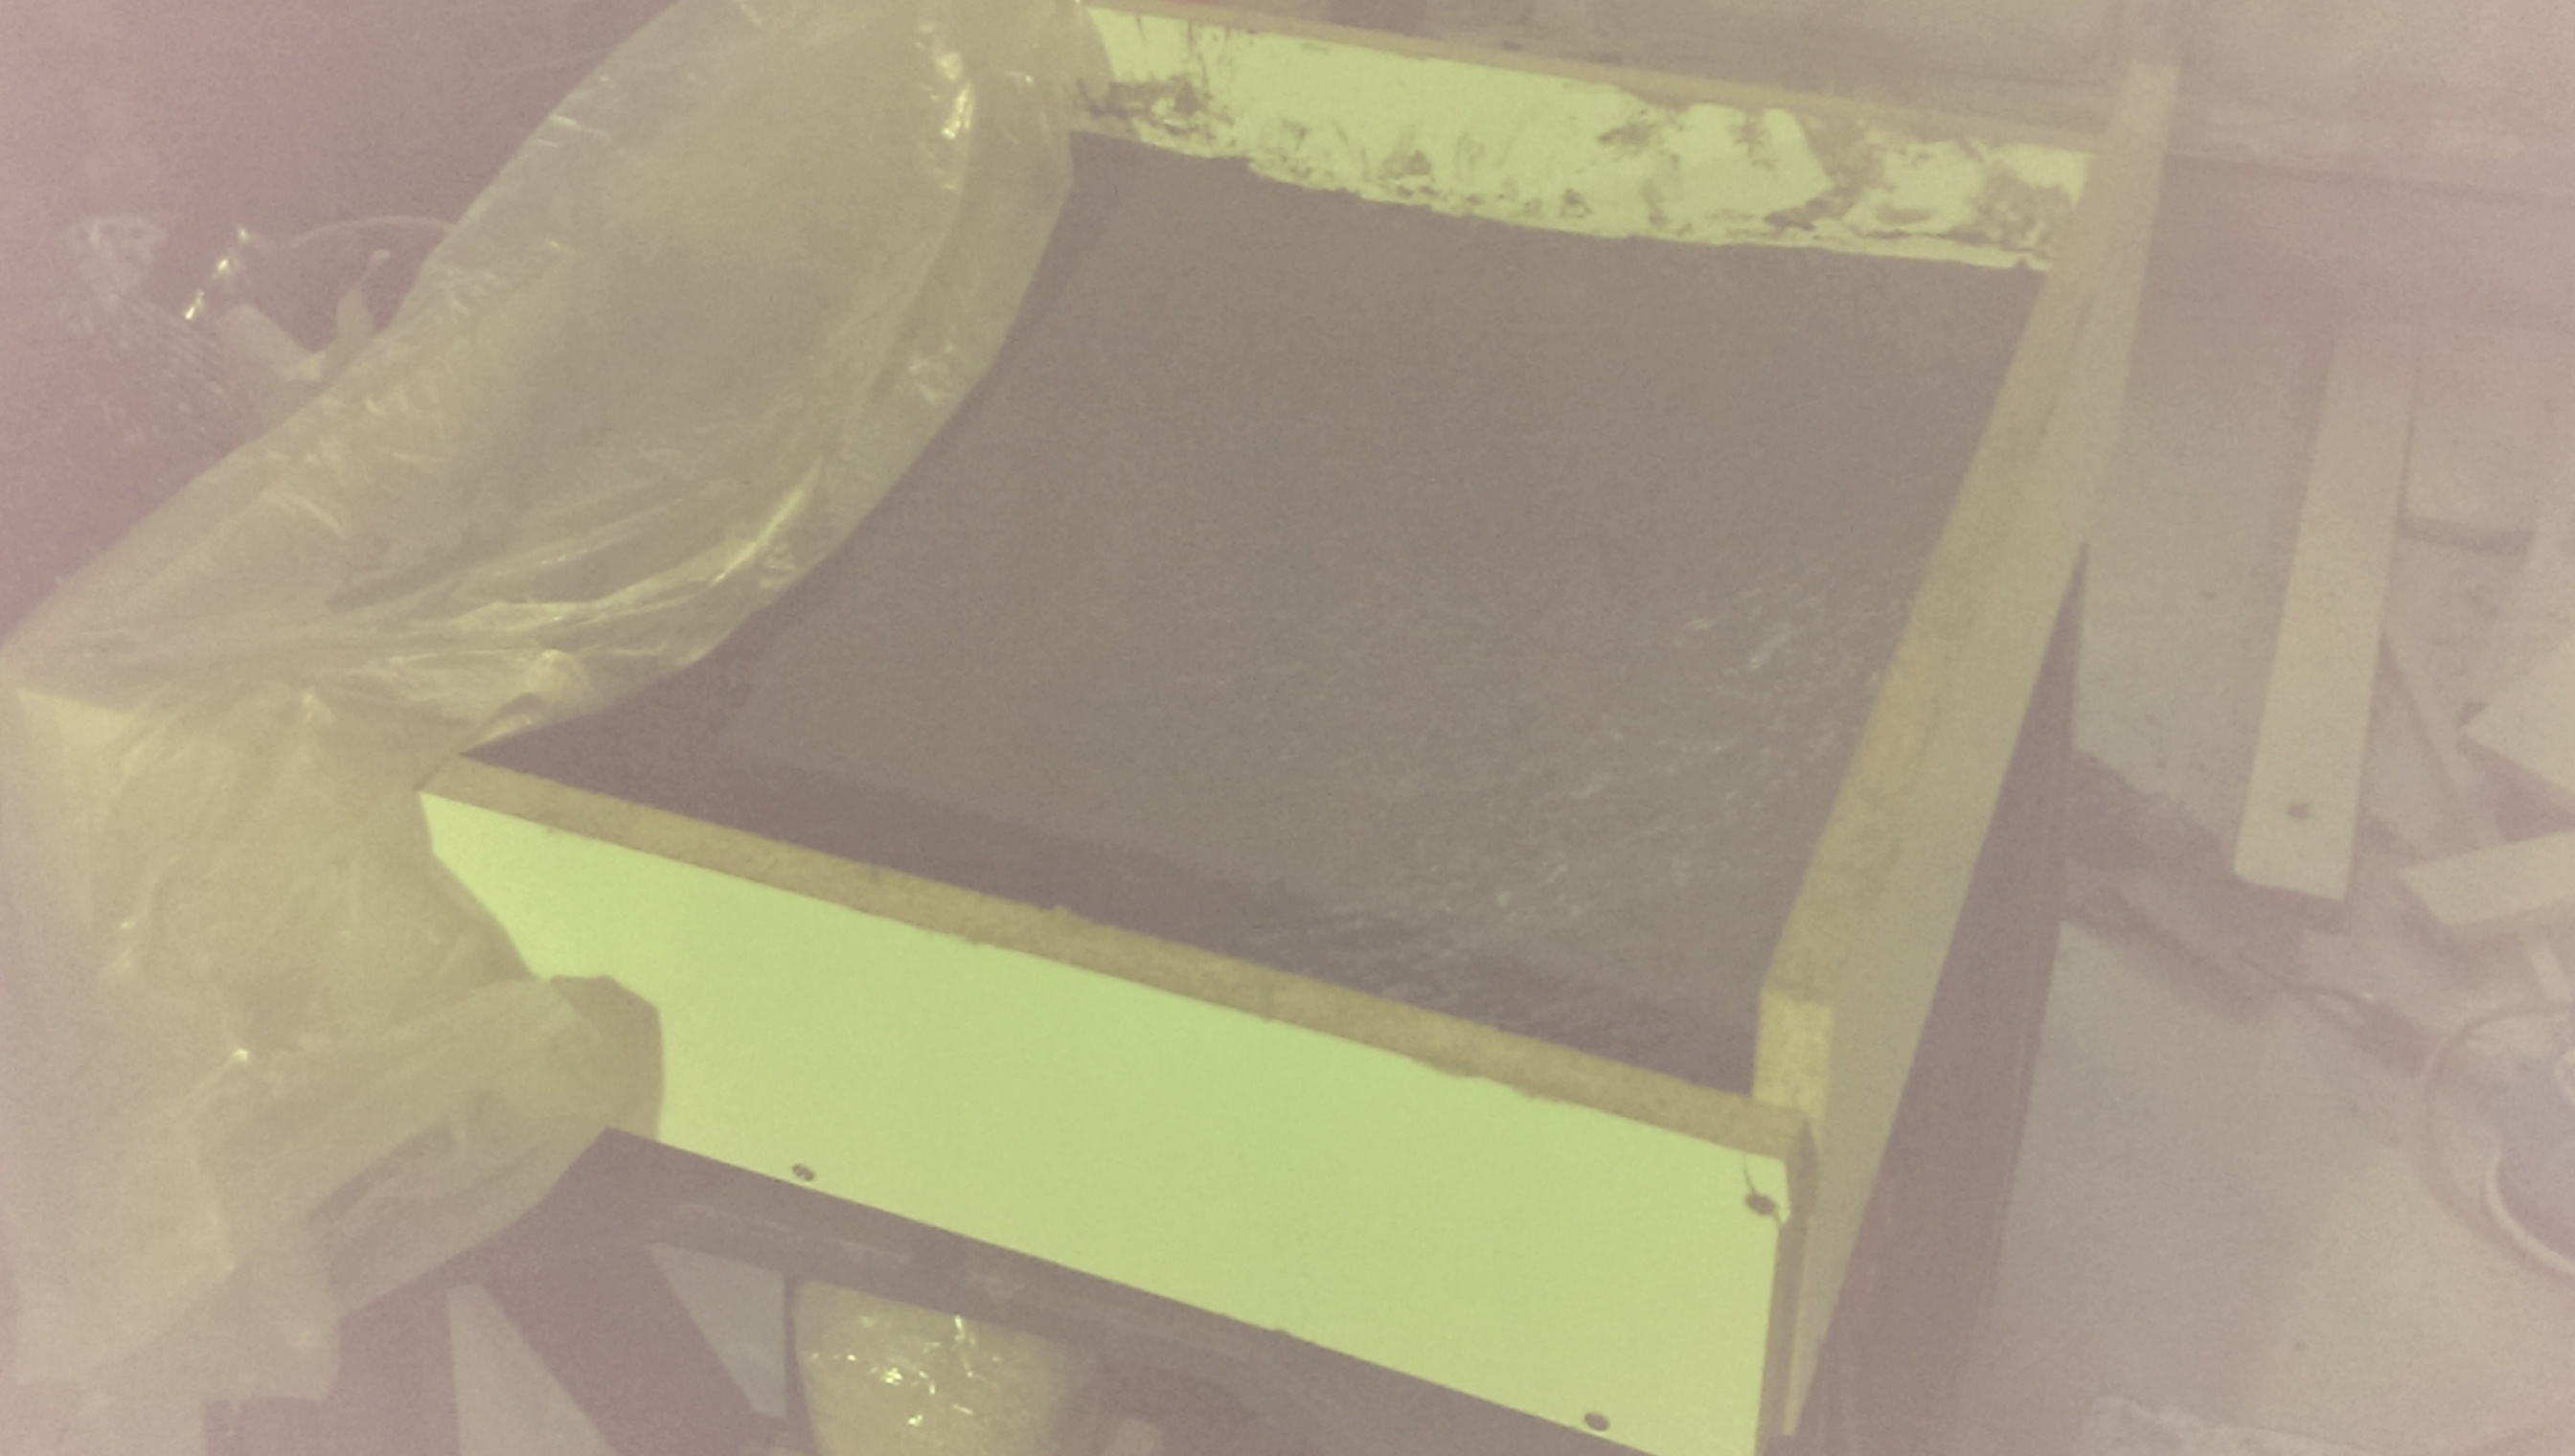
Next, I decided to take a detour from Bob's version. I wanted to add beach sand to give it more texture and beachy charm. I cleaned up the concrete and the mold, and followed that up with a coat of glue. Any old glue that dries clear would work, but I used Titebond Quick & Thick Multisurface glue. Then I just sprinkled the sand onto the glue, giving it the following effect:
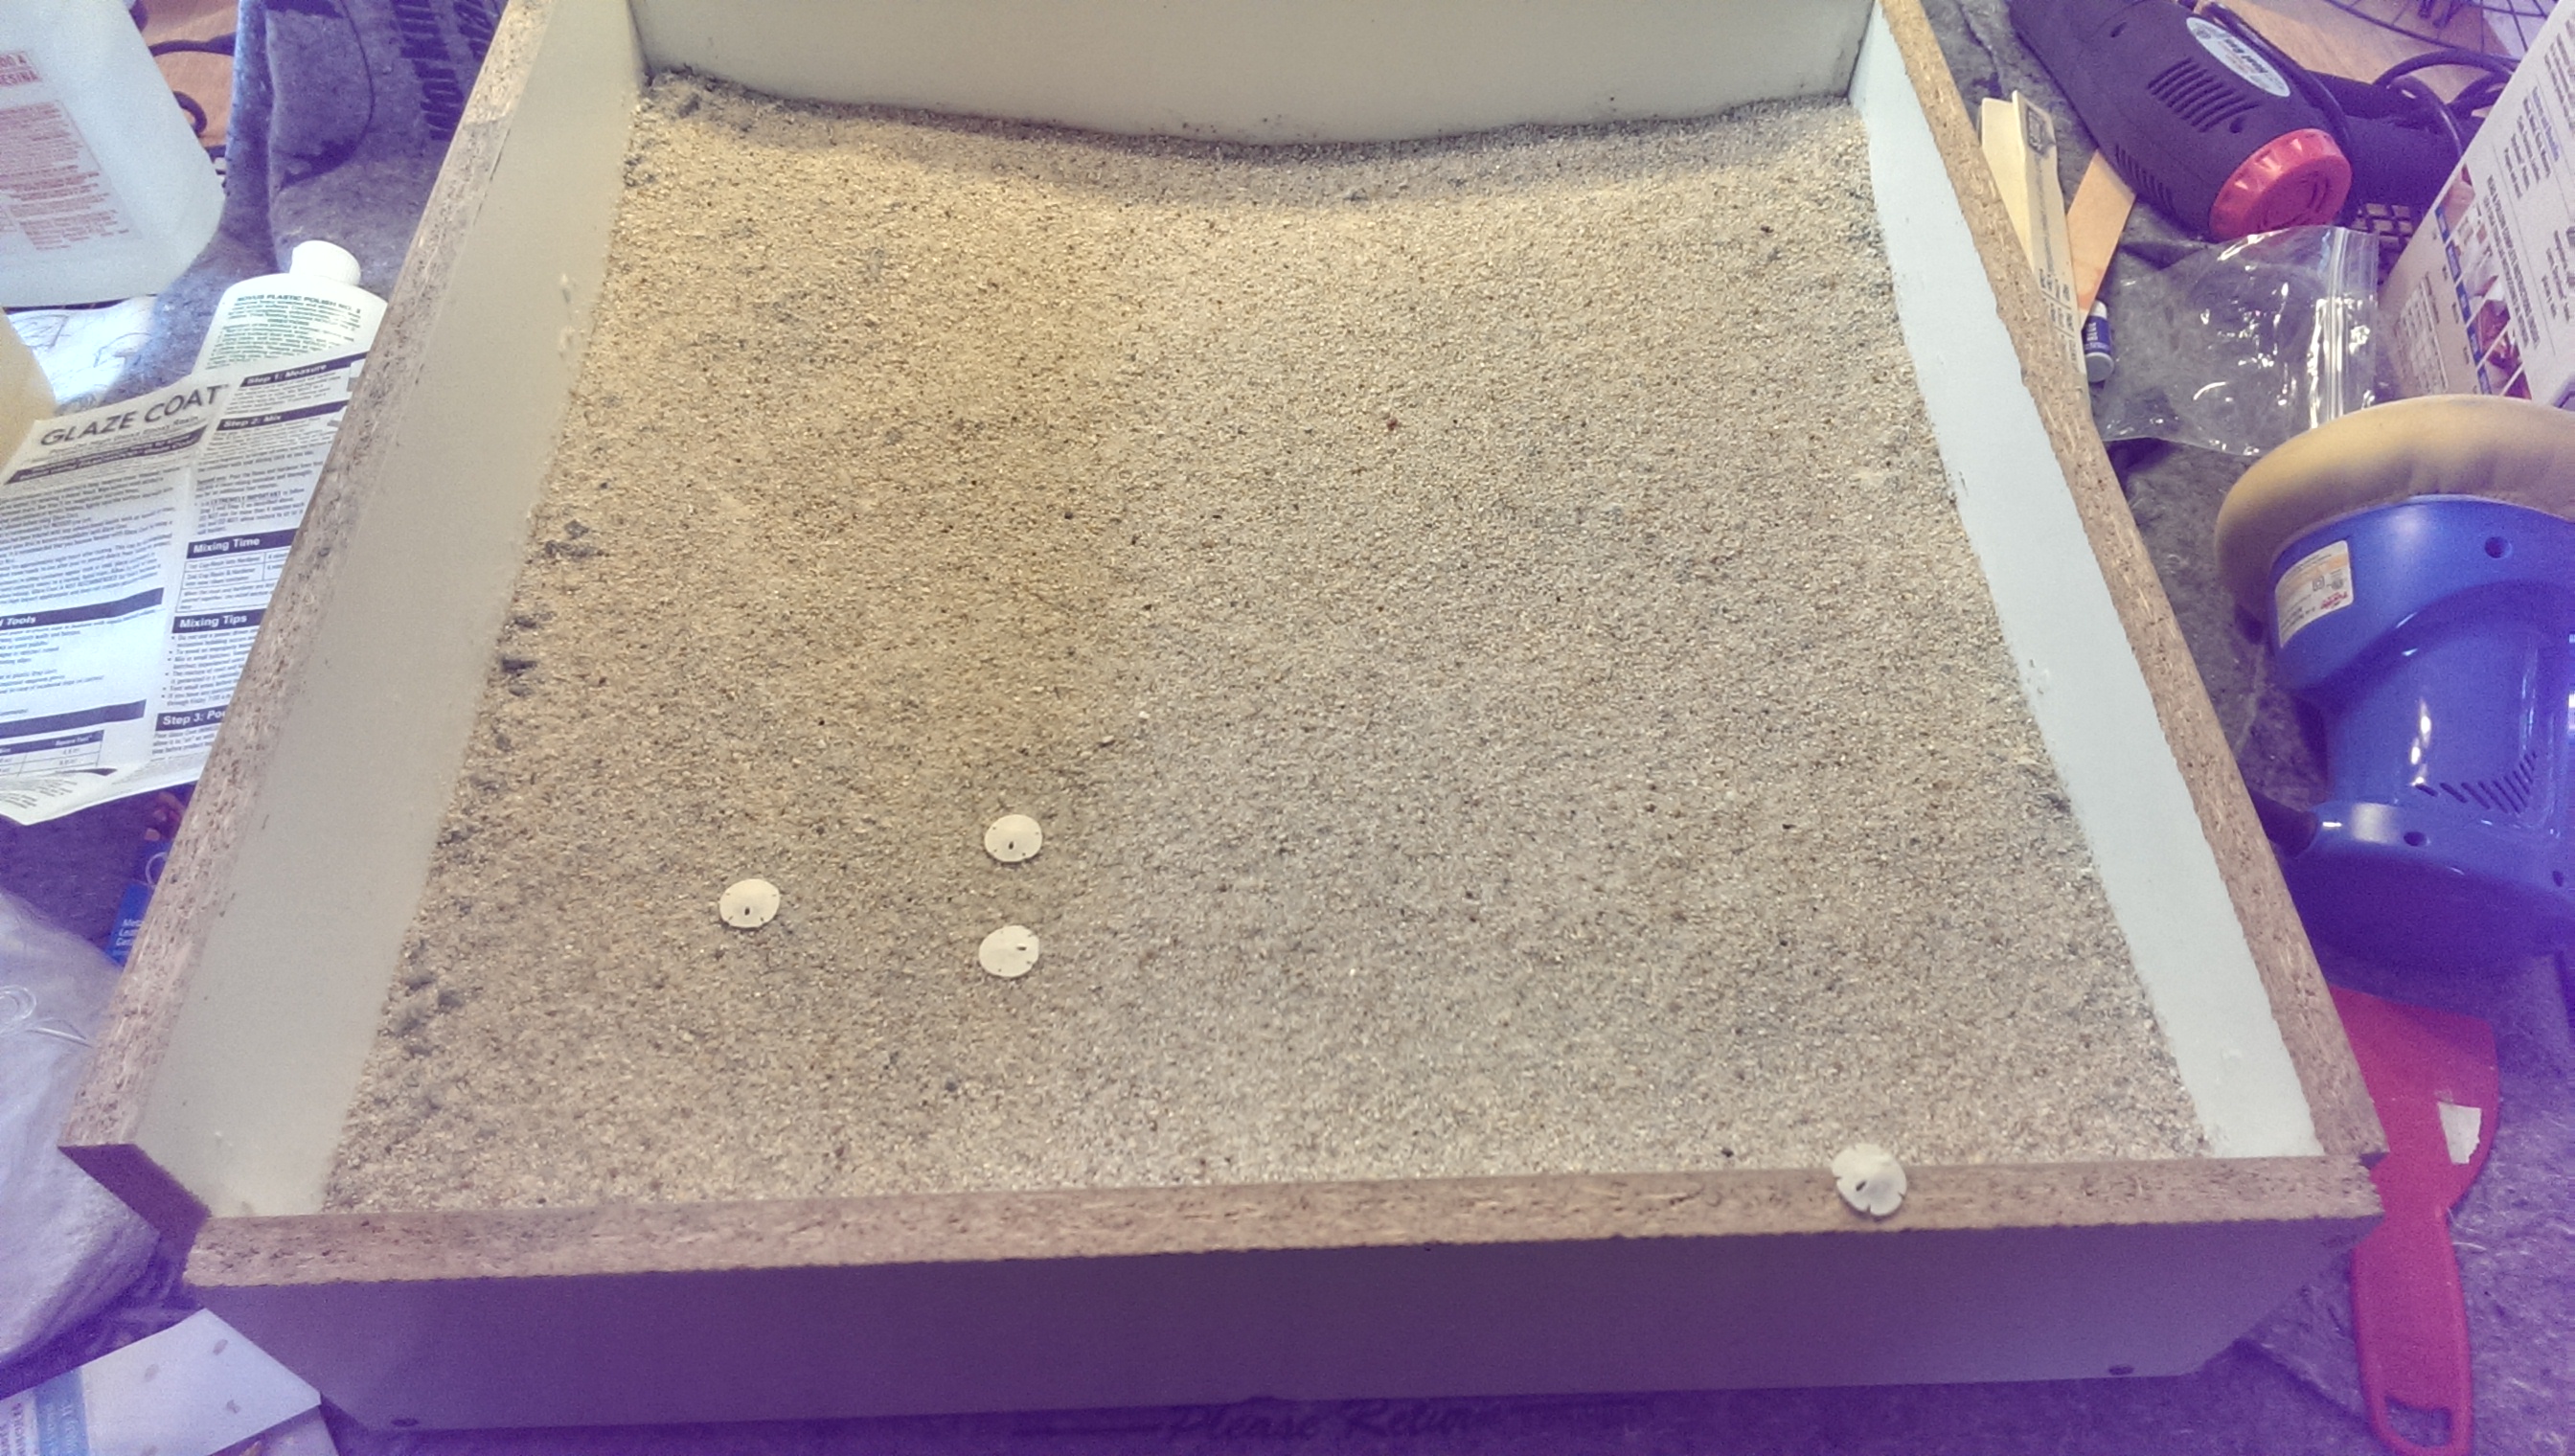
I decided to take more liberties in the design and seal in some things you might find at the beach - shells, sand dollars, and starfish. I glued them in place with the hot glue gun, but this wasn't really necessary, as you could just as easily place these items into the first coat of epoxy and shift them around until you find a configuration that you like.
I followed up with the first pour of epoxy. Just like Bob, I used blue dye to complete the ocean illusion, starting with a higher concentration in the first couple of layers:
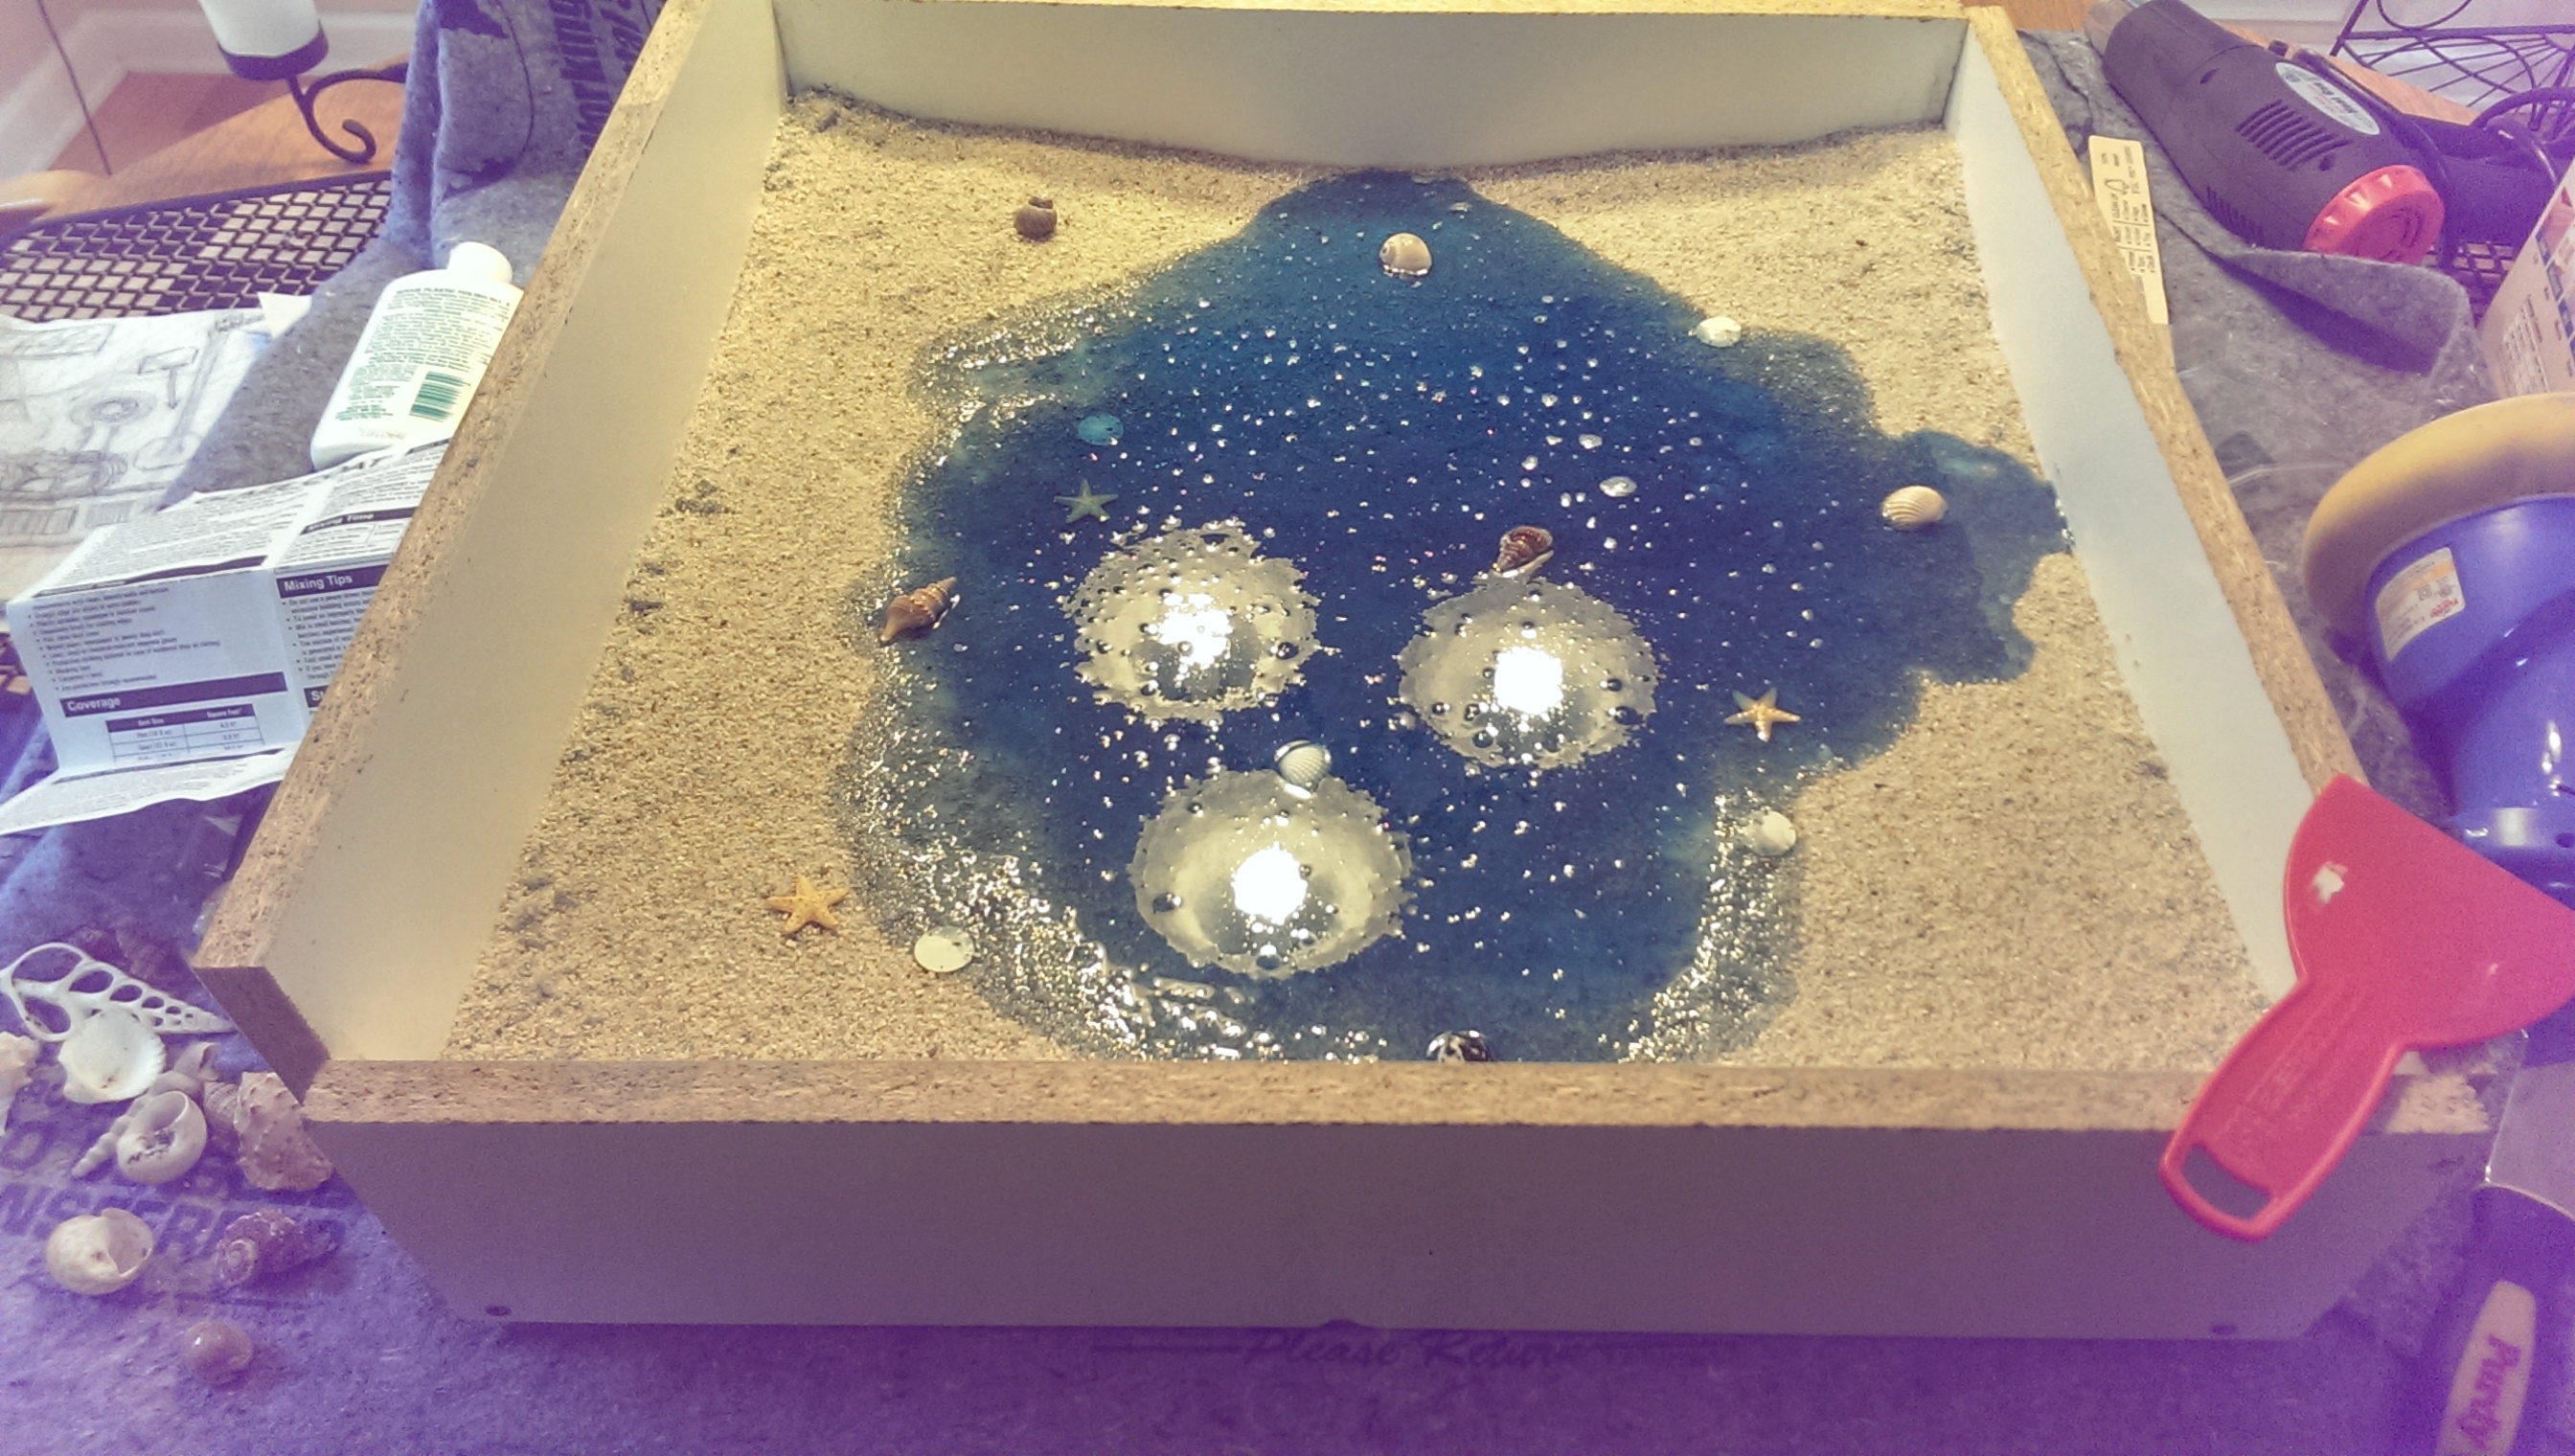
The epoxy did react slightly with the sand and glue. At first, I was worried that the epoxy was going to unseat the sand from the glue and I'd be left with sand floating in the epoxy. The sand started to clump a bit in a few places, but ultimately held its ground. I'm not sure exactly why this happened, but it turned out just fine.
After a couple of pours with high concentrations of dye, I started to lighten the layers to produce the illusion of depth. It was a bit of a crap shoot determining how much to cut it by, but I started by cutting it in half. If you were pouring a table that was thicker, you might cut out a bit less dye, but in my case it was just about right:
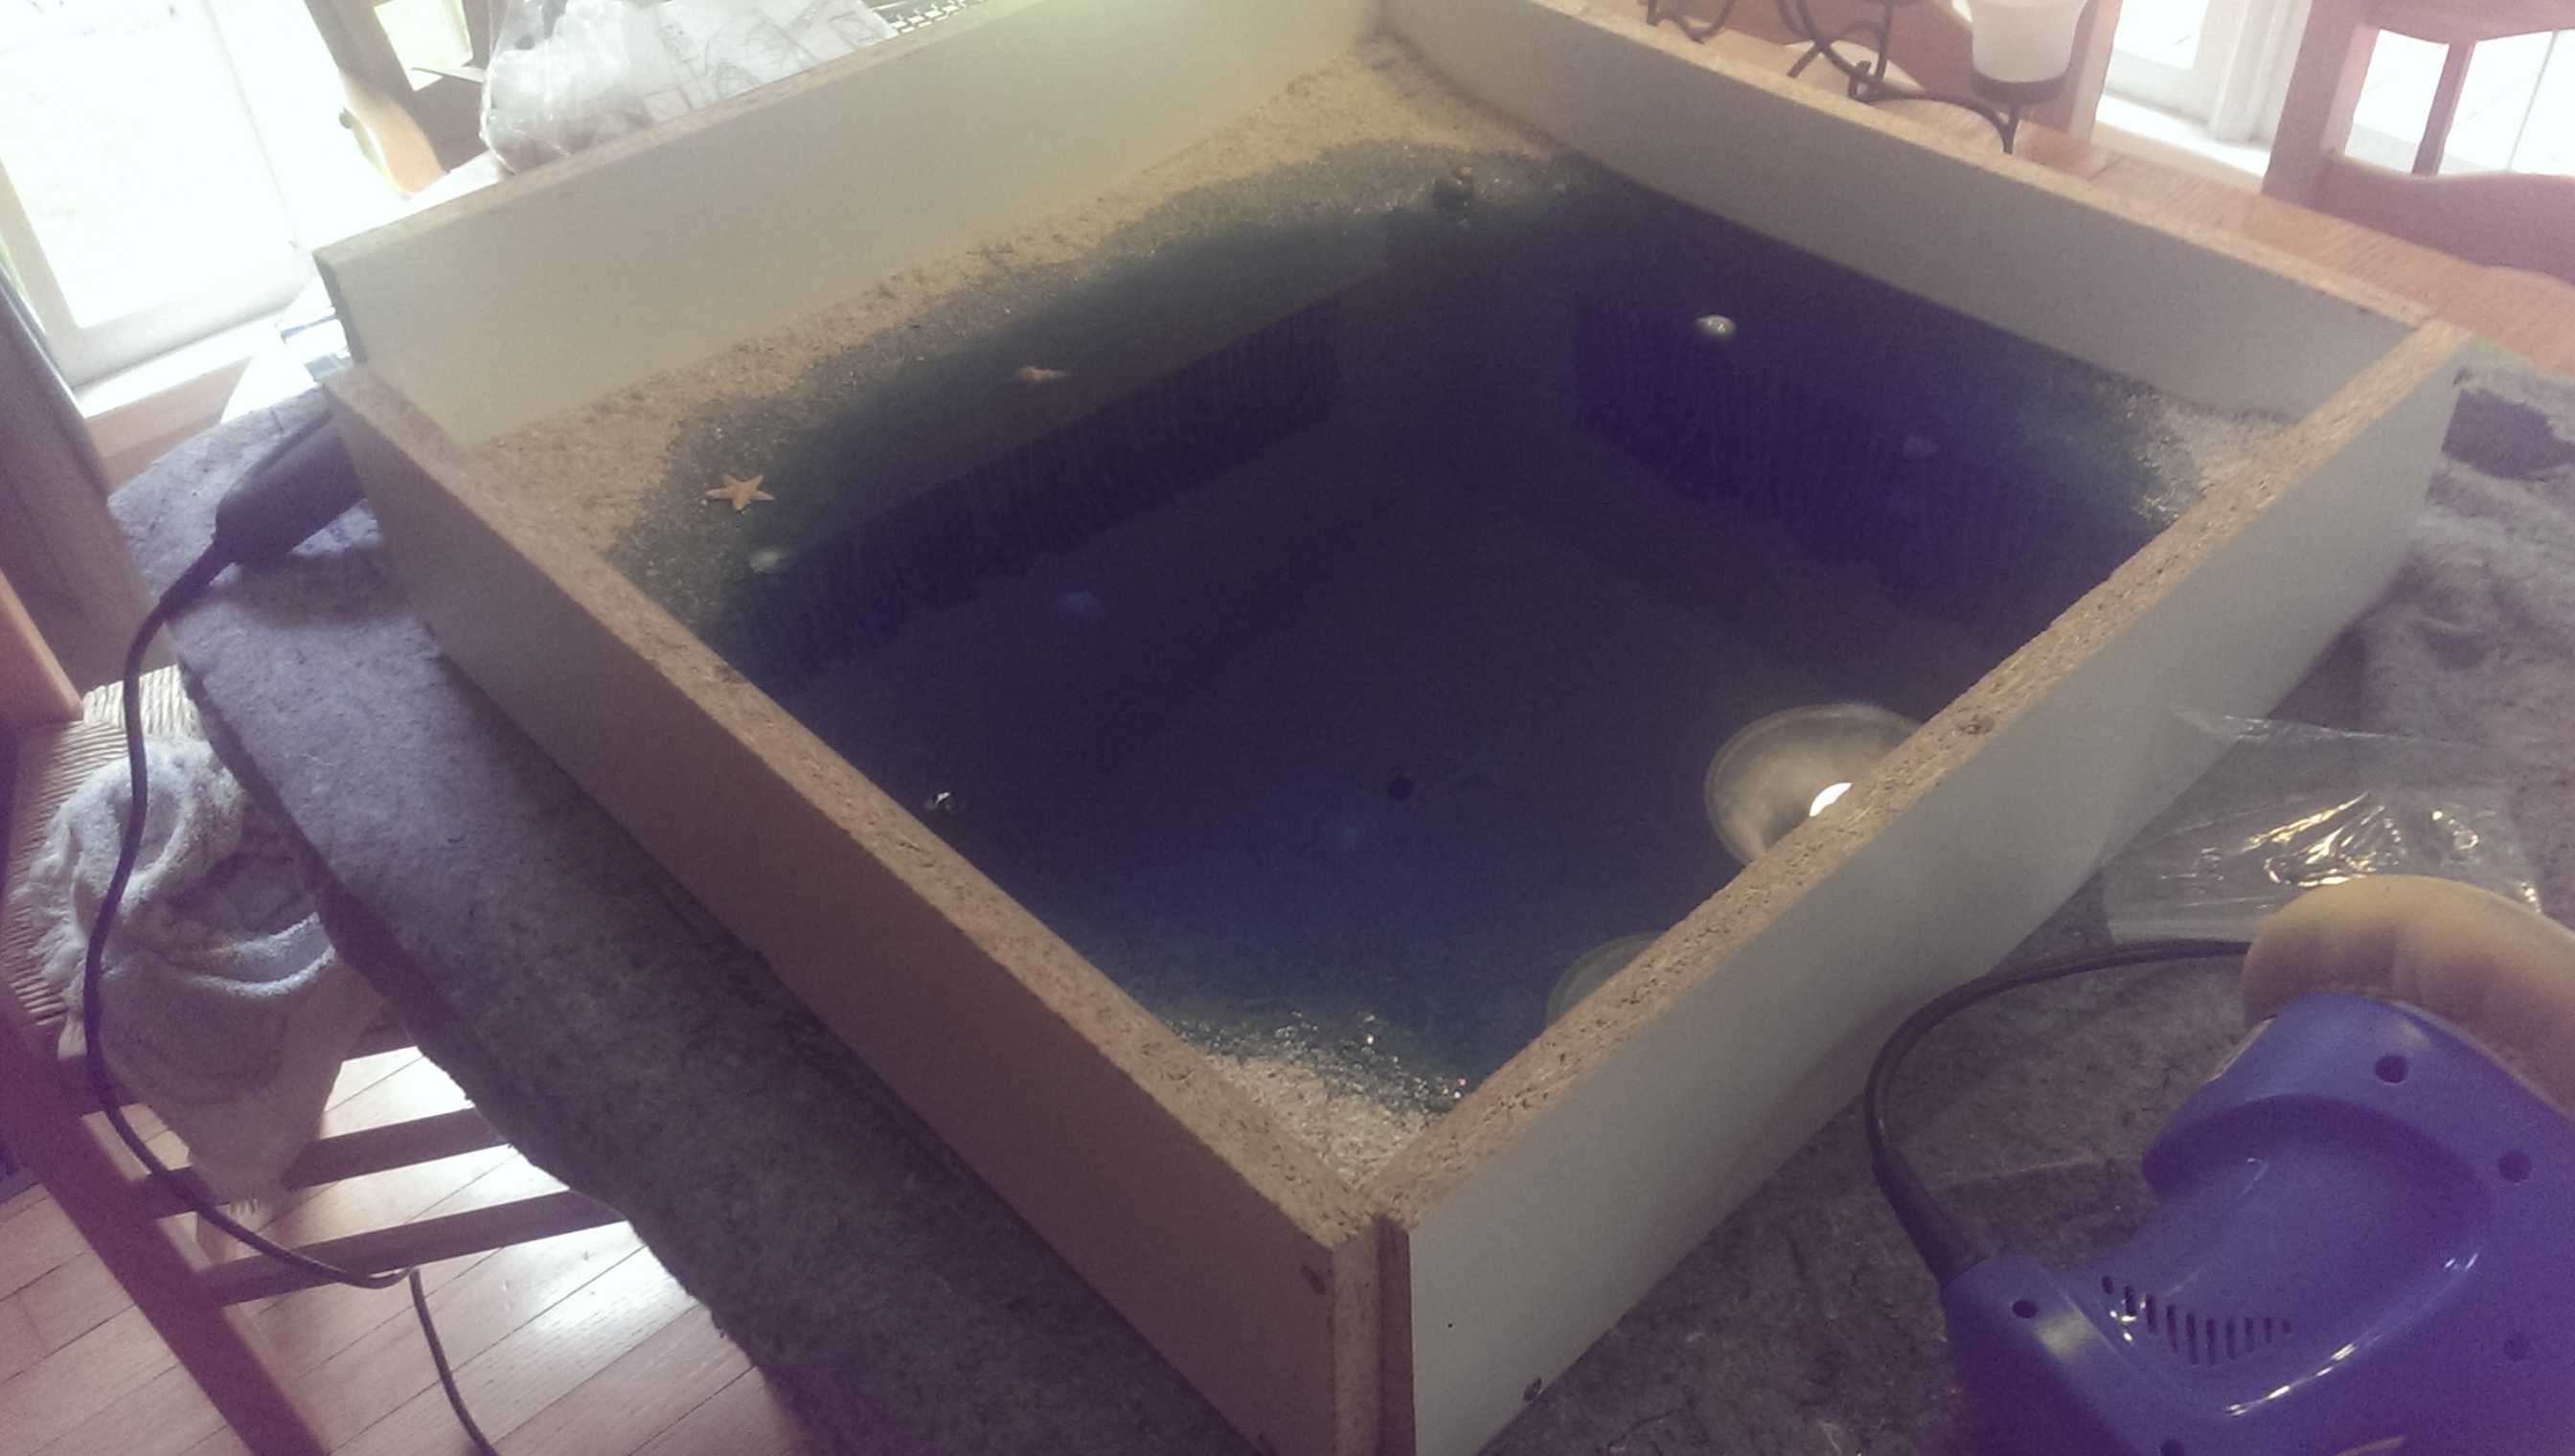
Continuing the trend, I took the amount of dye down to about a third for the last 2 pours. I ended up using approximately 3 gallons of epoxy and made about 8 pours. By the third or fourth pour, I started mixing 64oz batches to move things along. After the final pour, it looked pretty good:
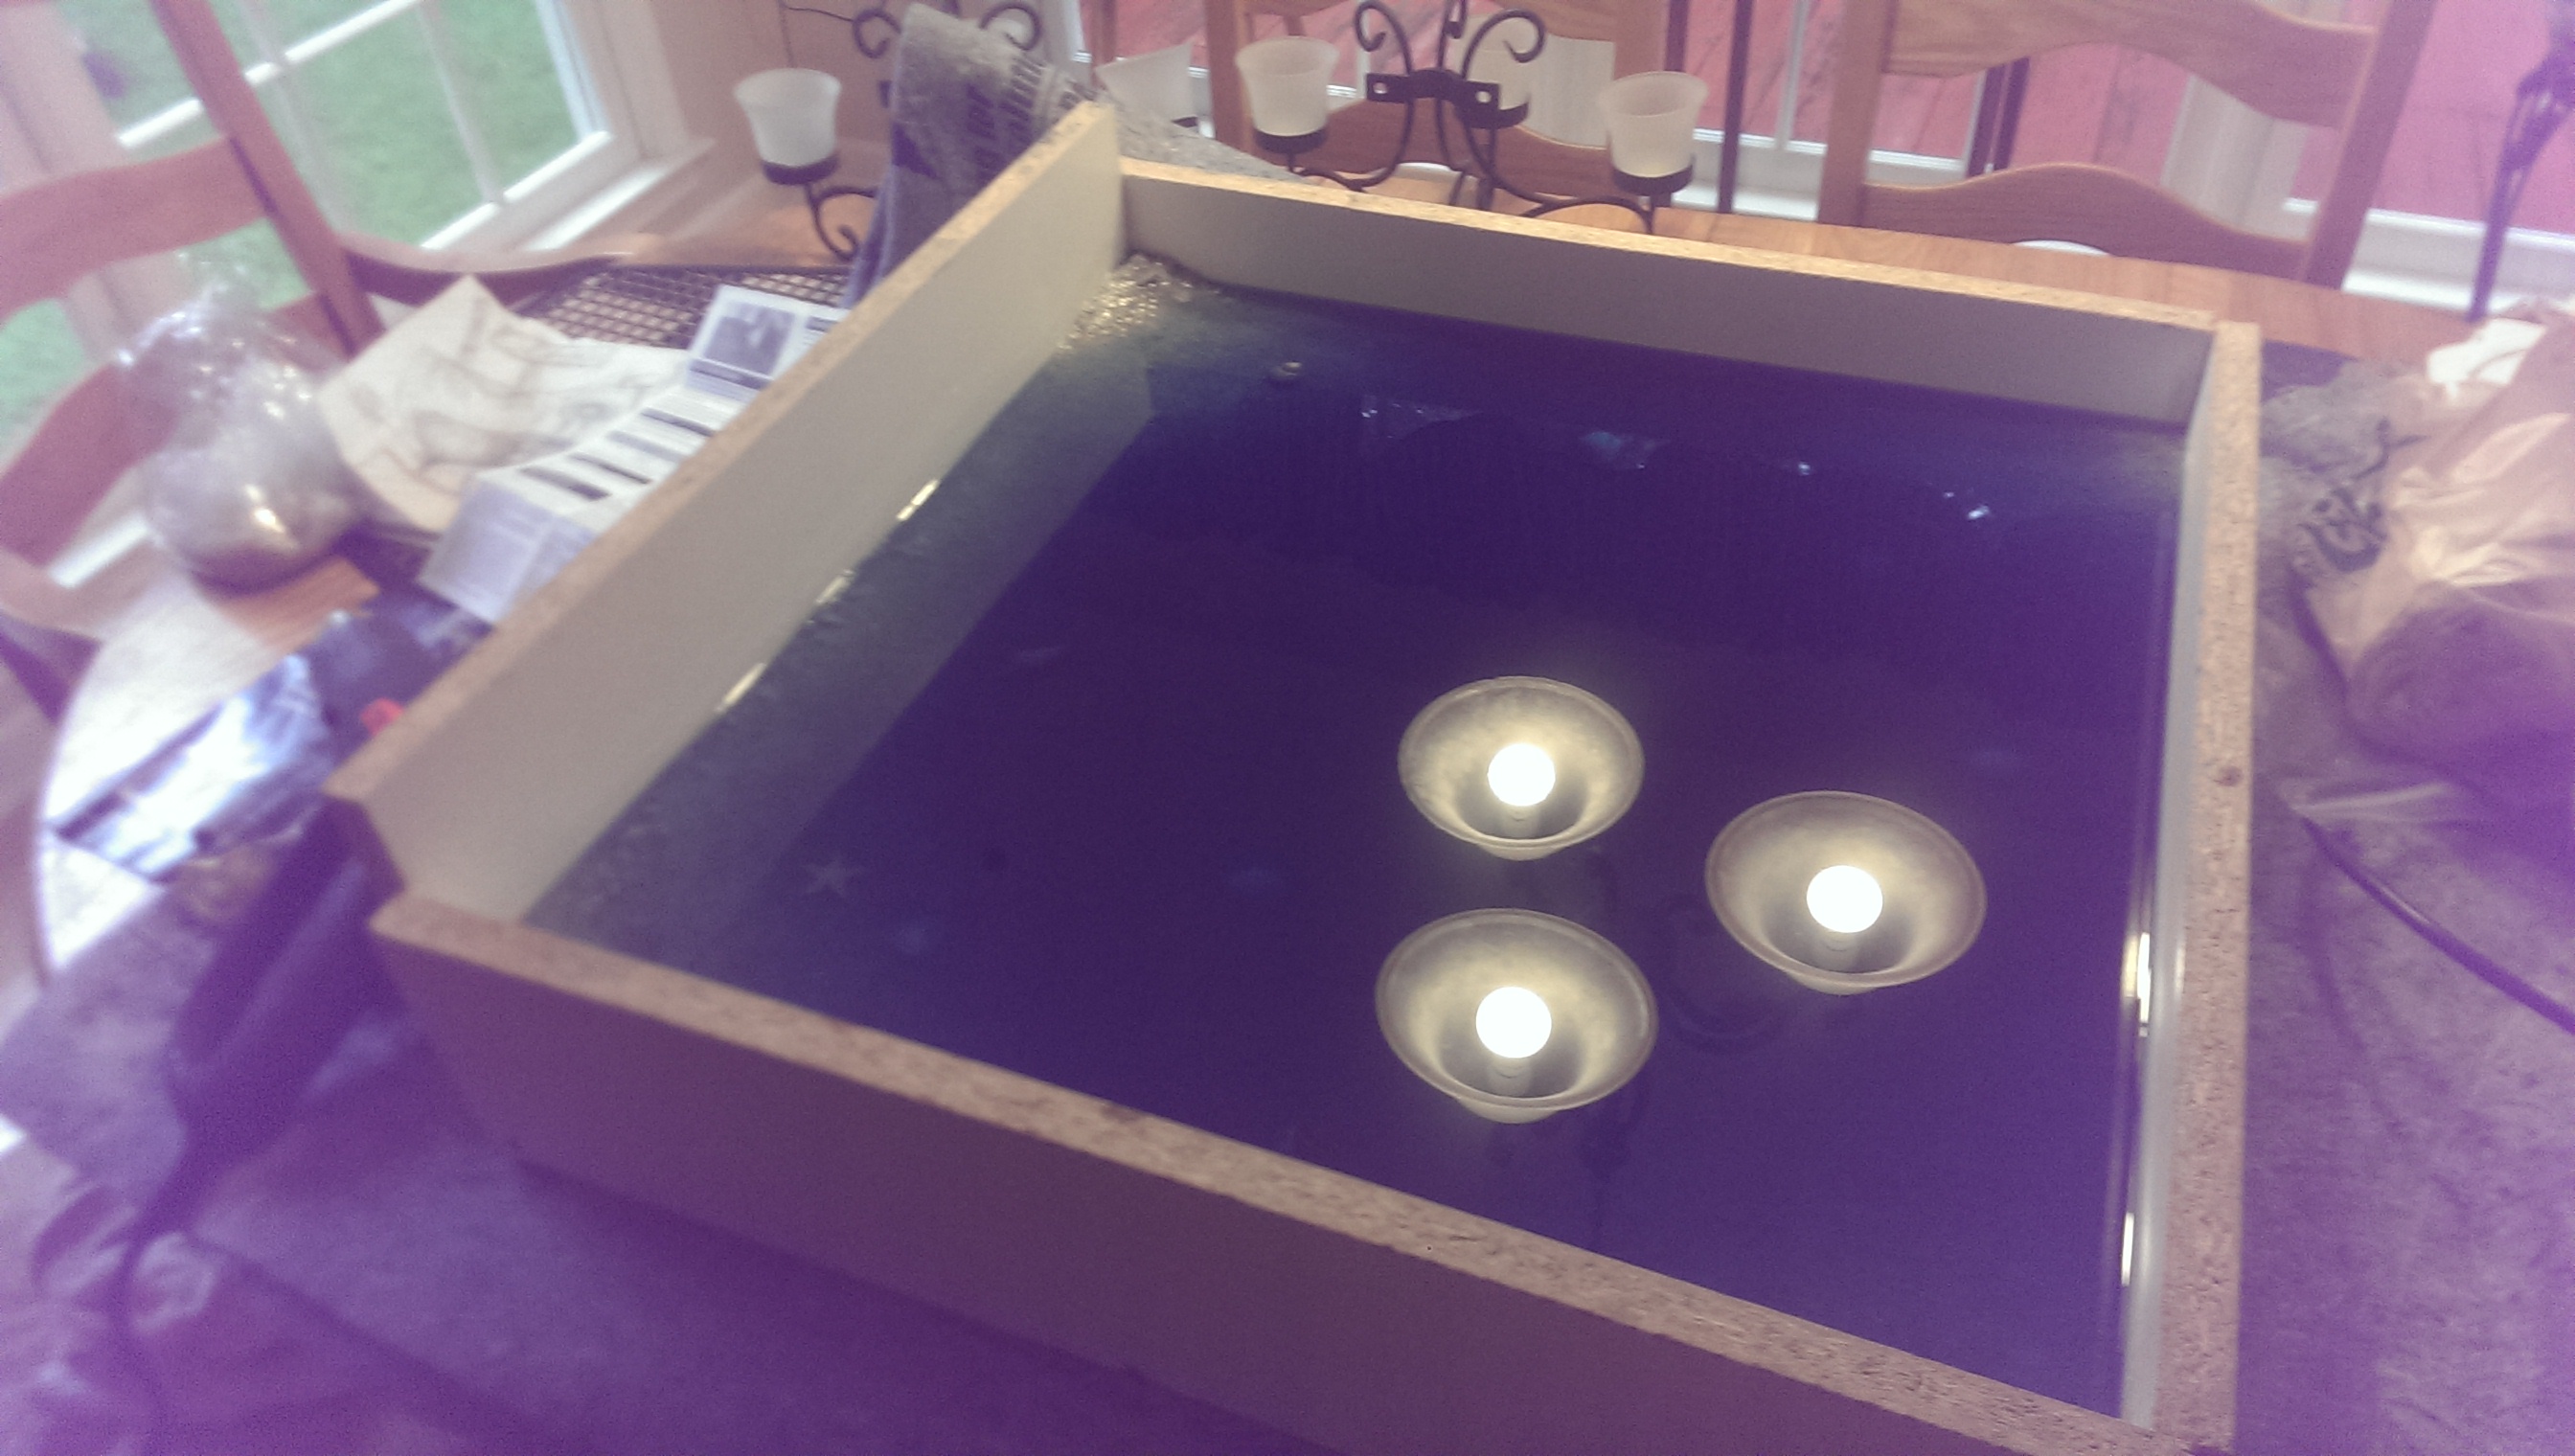
After the resin cured, I cracked open the mold and had a look. Well, it wasn't as clean as I expected, but I was still relatively pleased with the result:
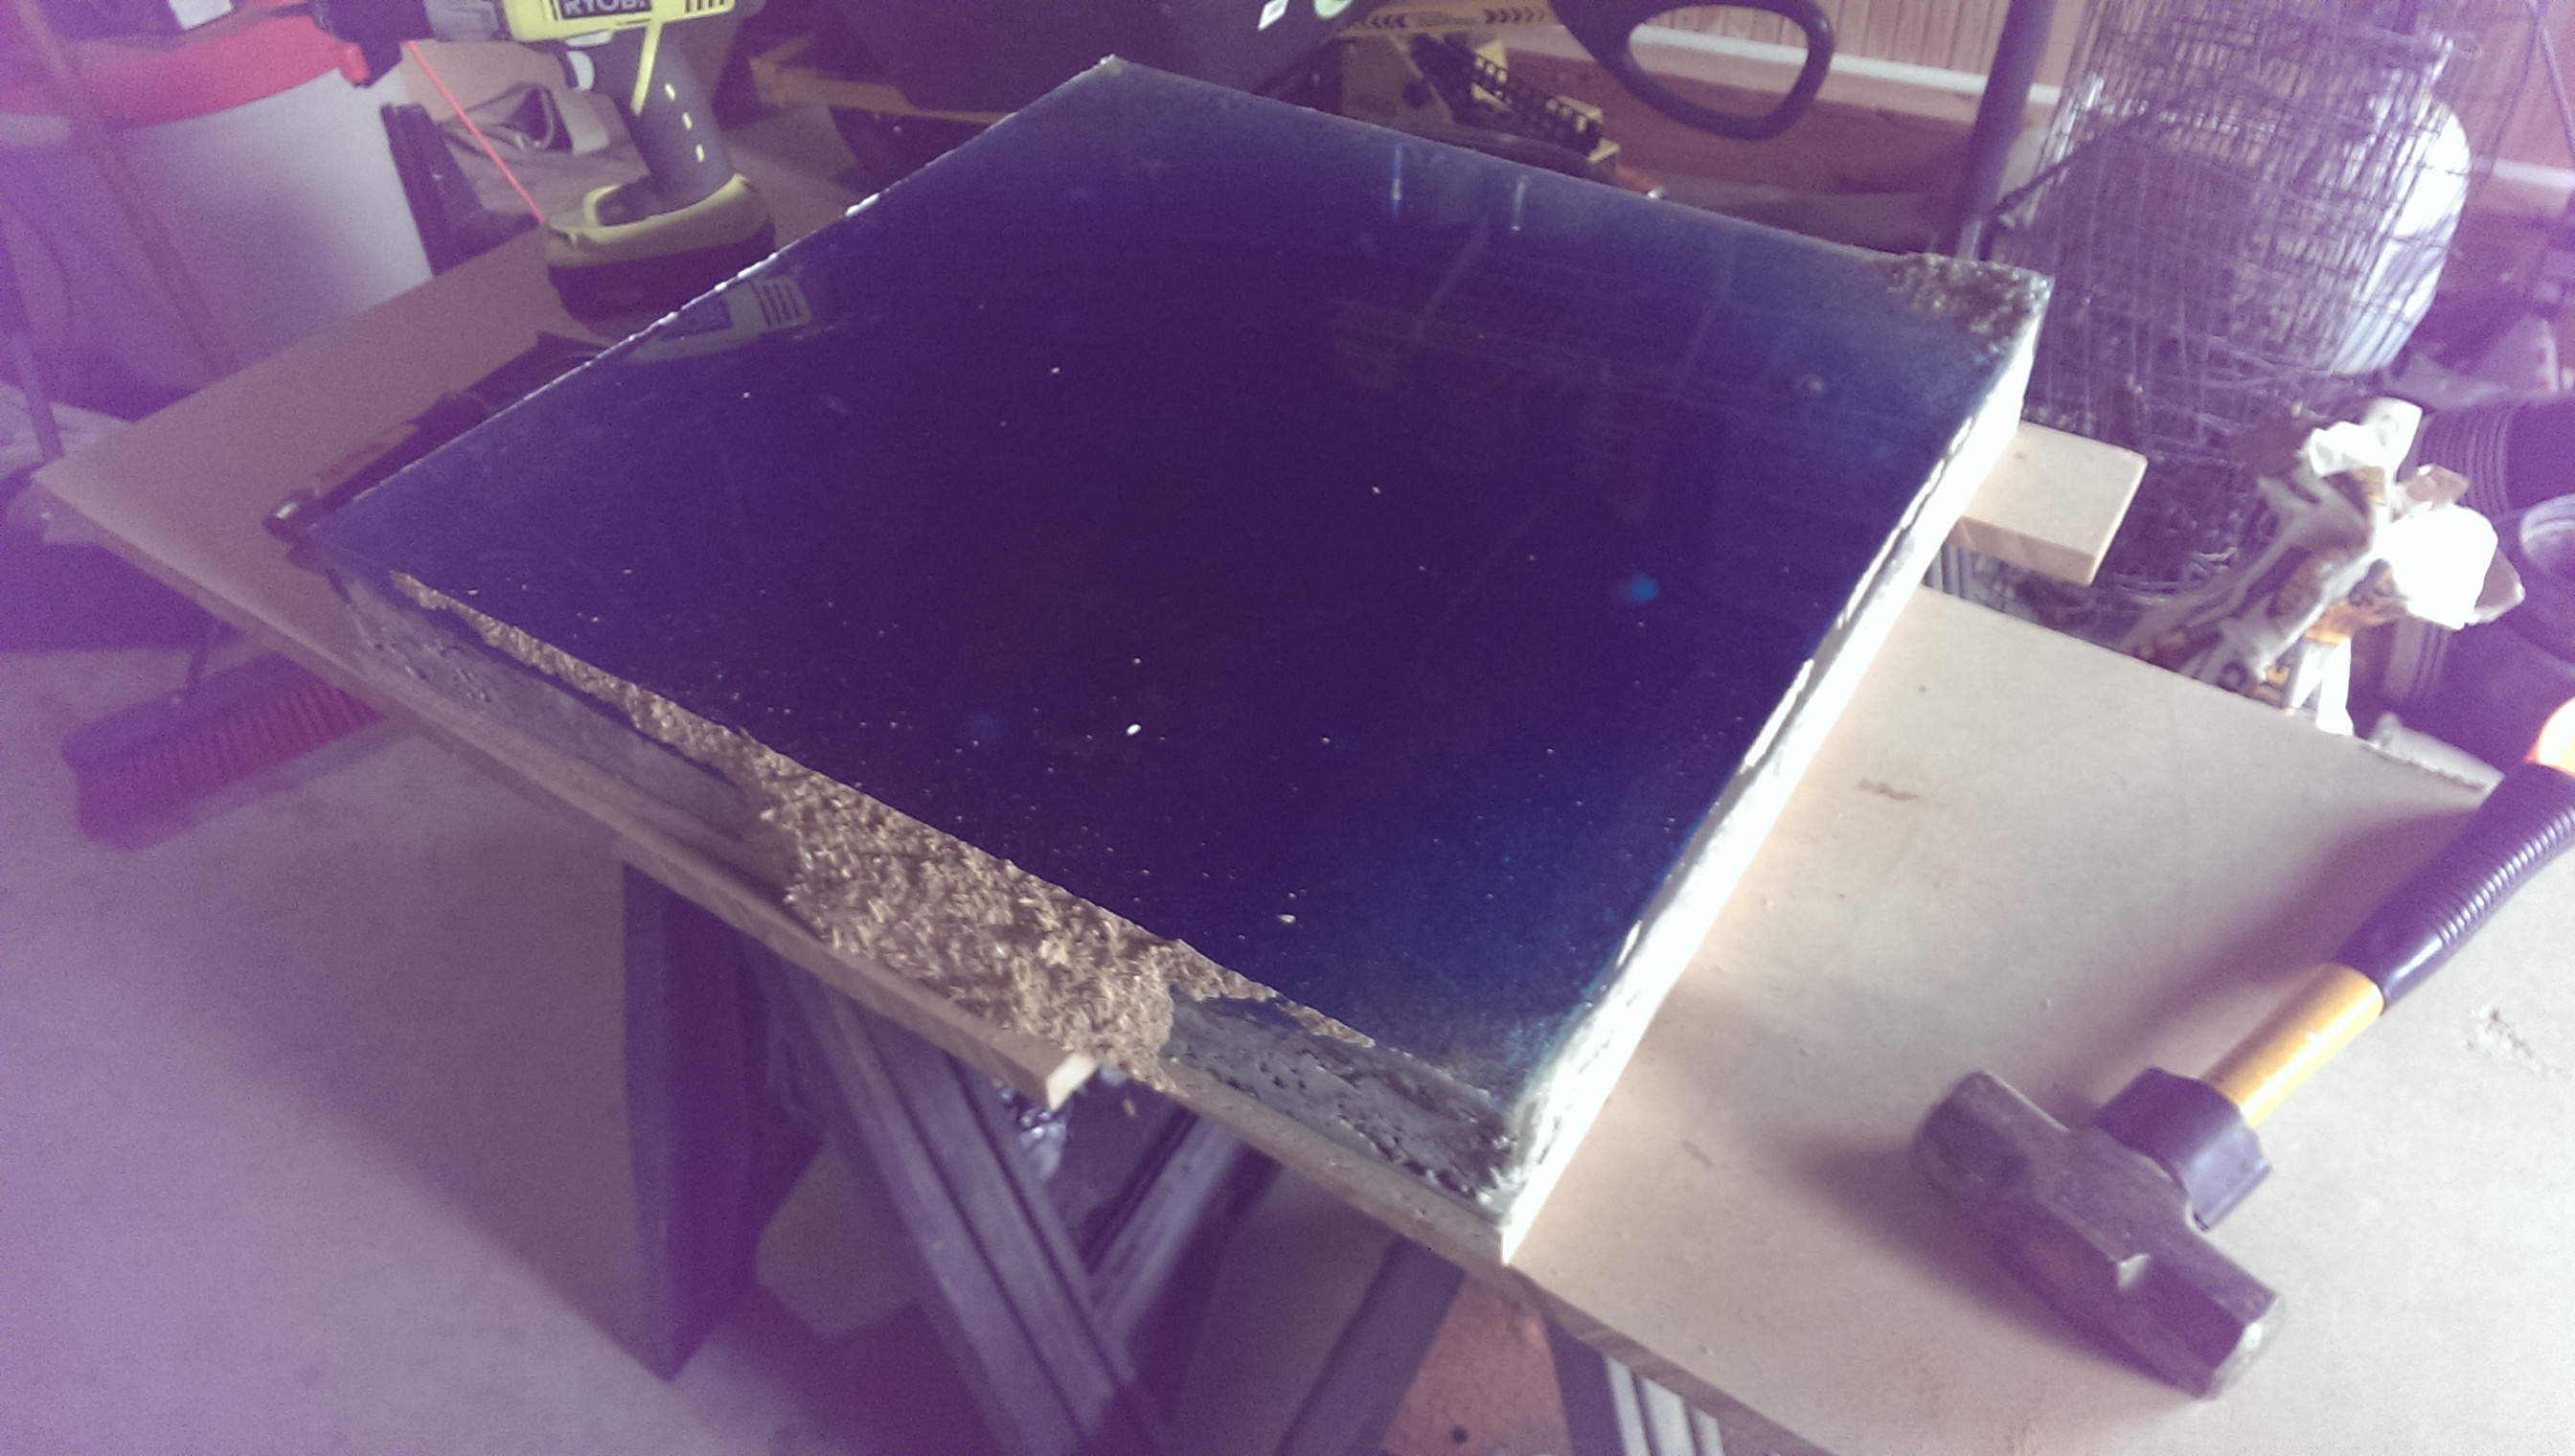
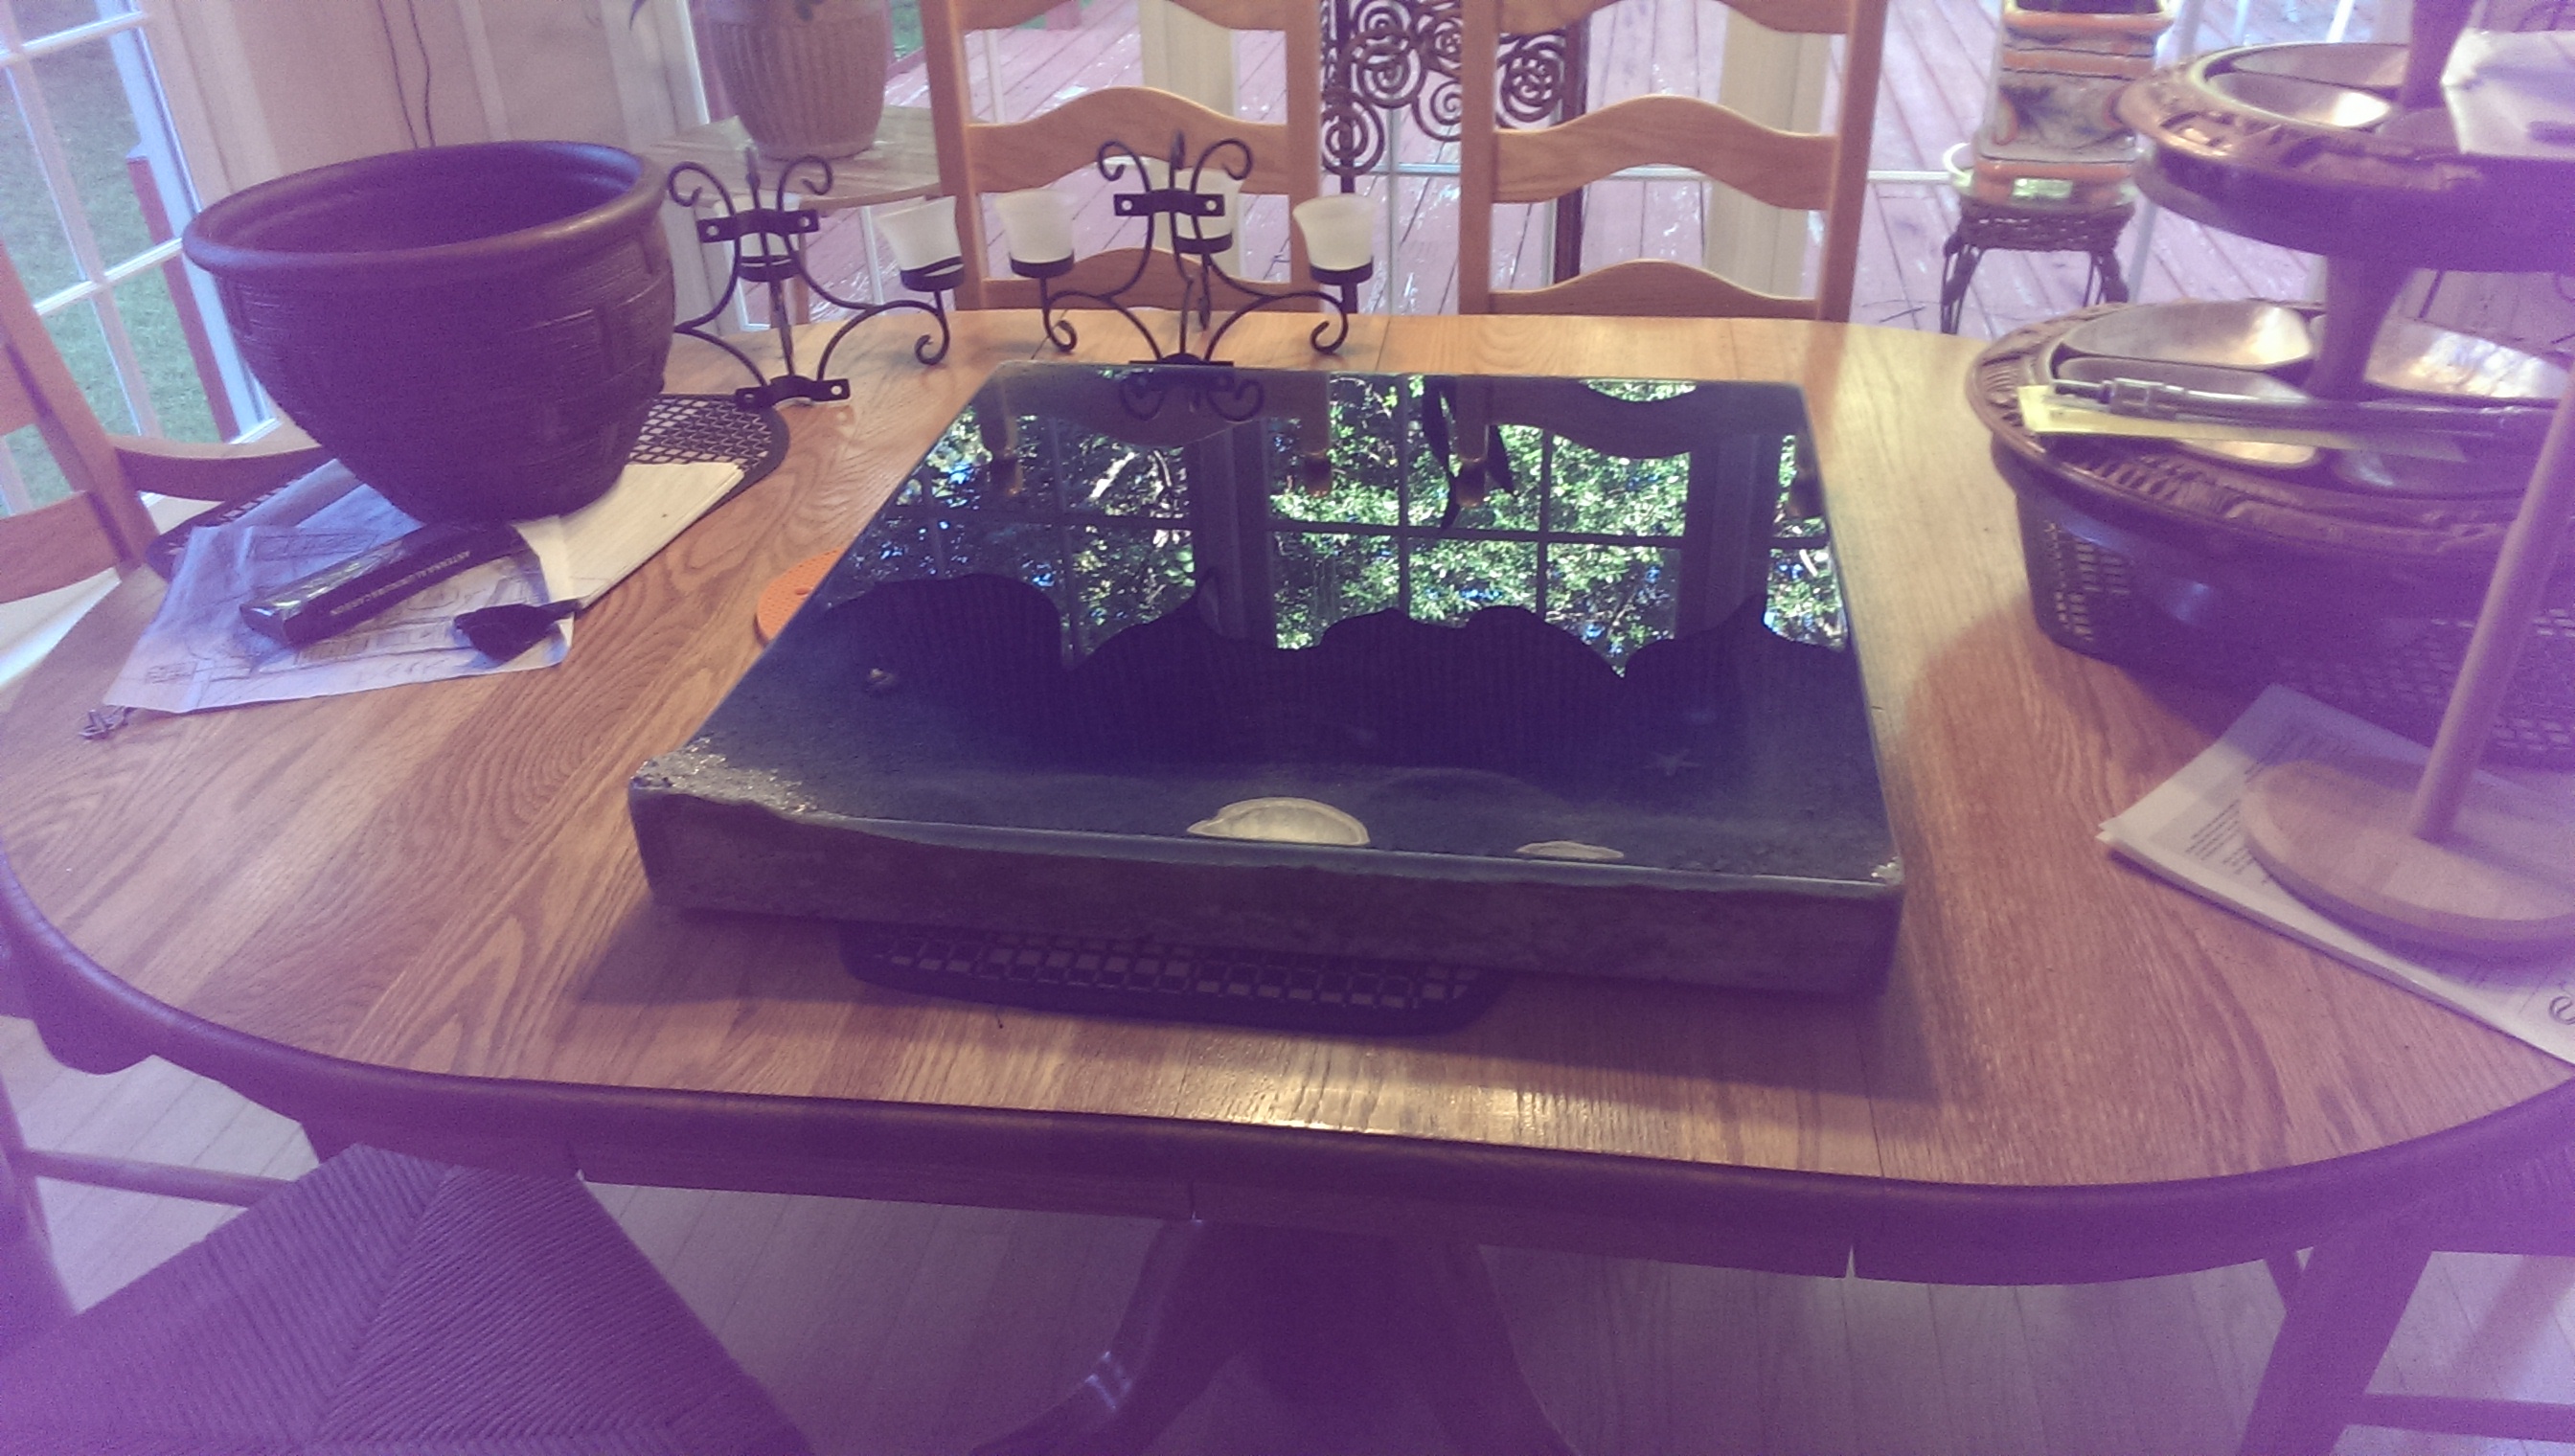
I'll spare you the boring details, but after sanding down the sharp edges and chiseling and sanding off the melamine and wood that stuck to the resin, I finally had something that I could get excited about. I polished the resin with Novus 3-part polish, which is designed for plastics, I believe. It works pretty well on epoxy, too. I don't know about you, but at my house I do this type of thing on the kitchen table apparently:
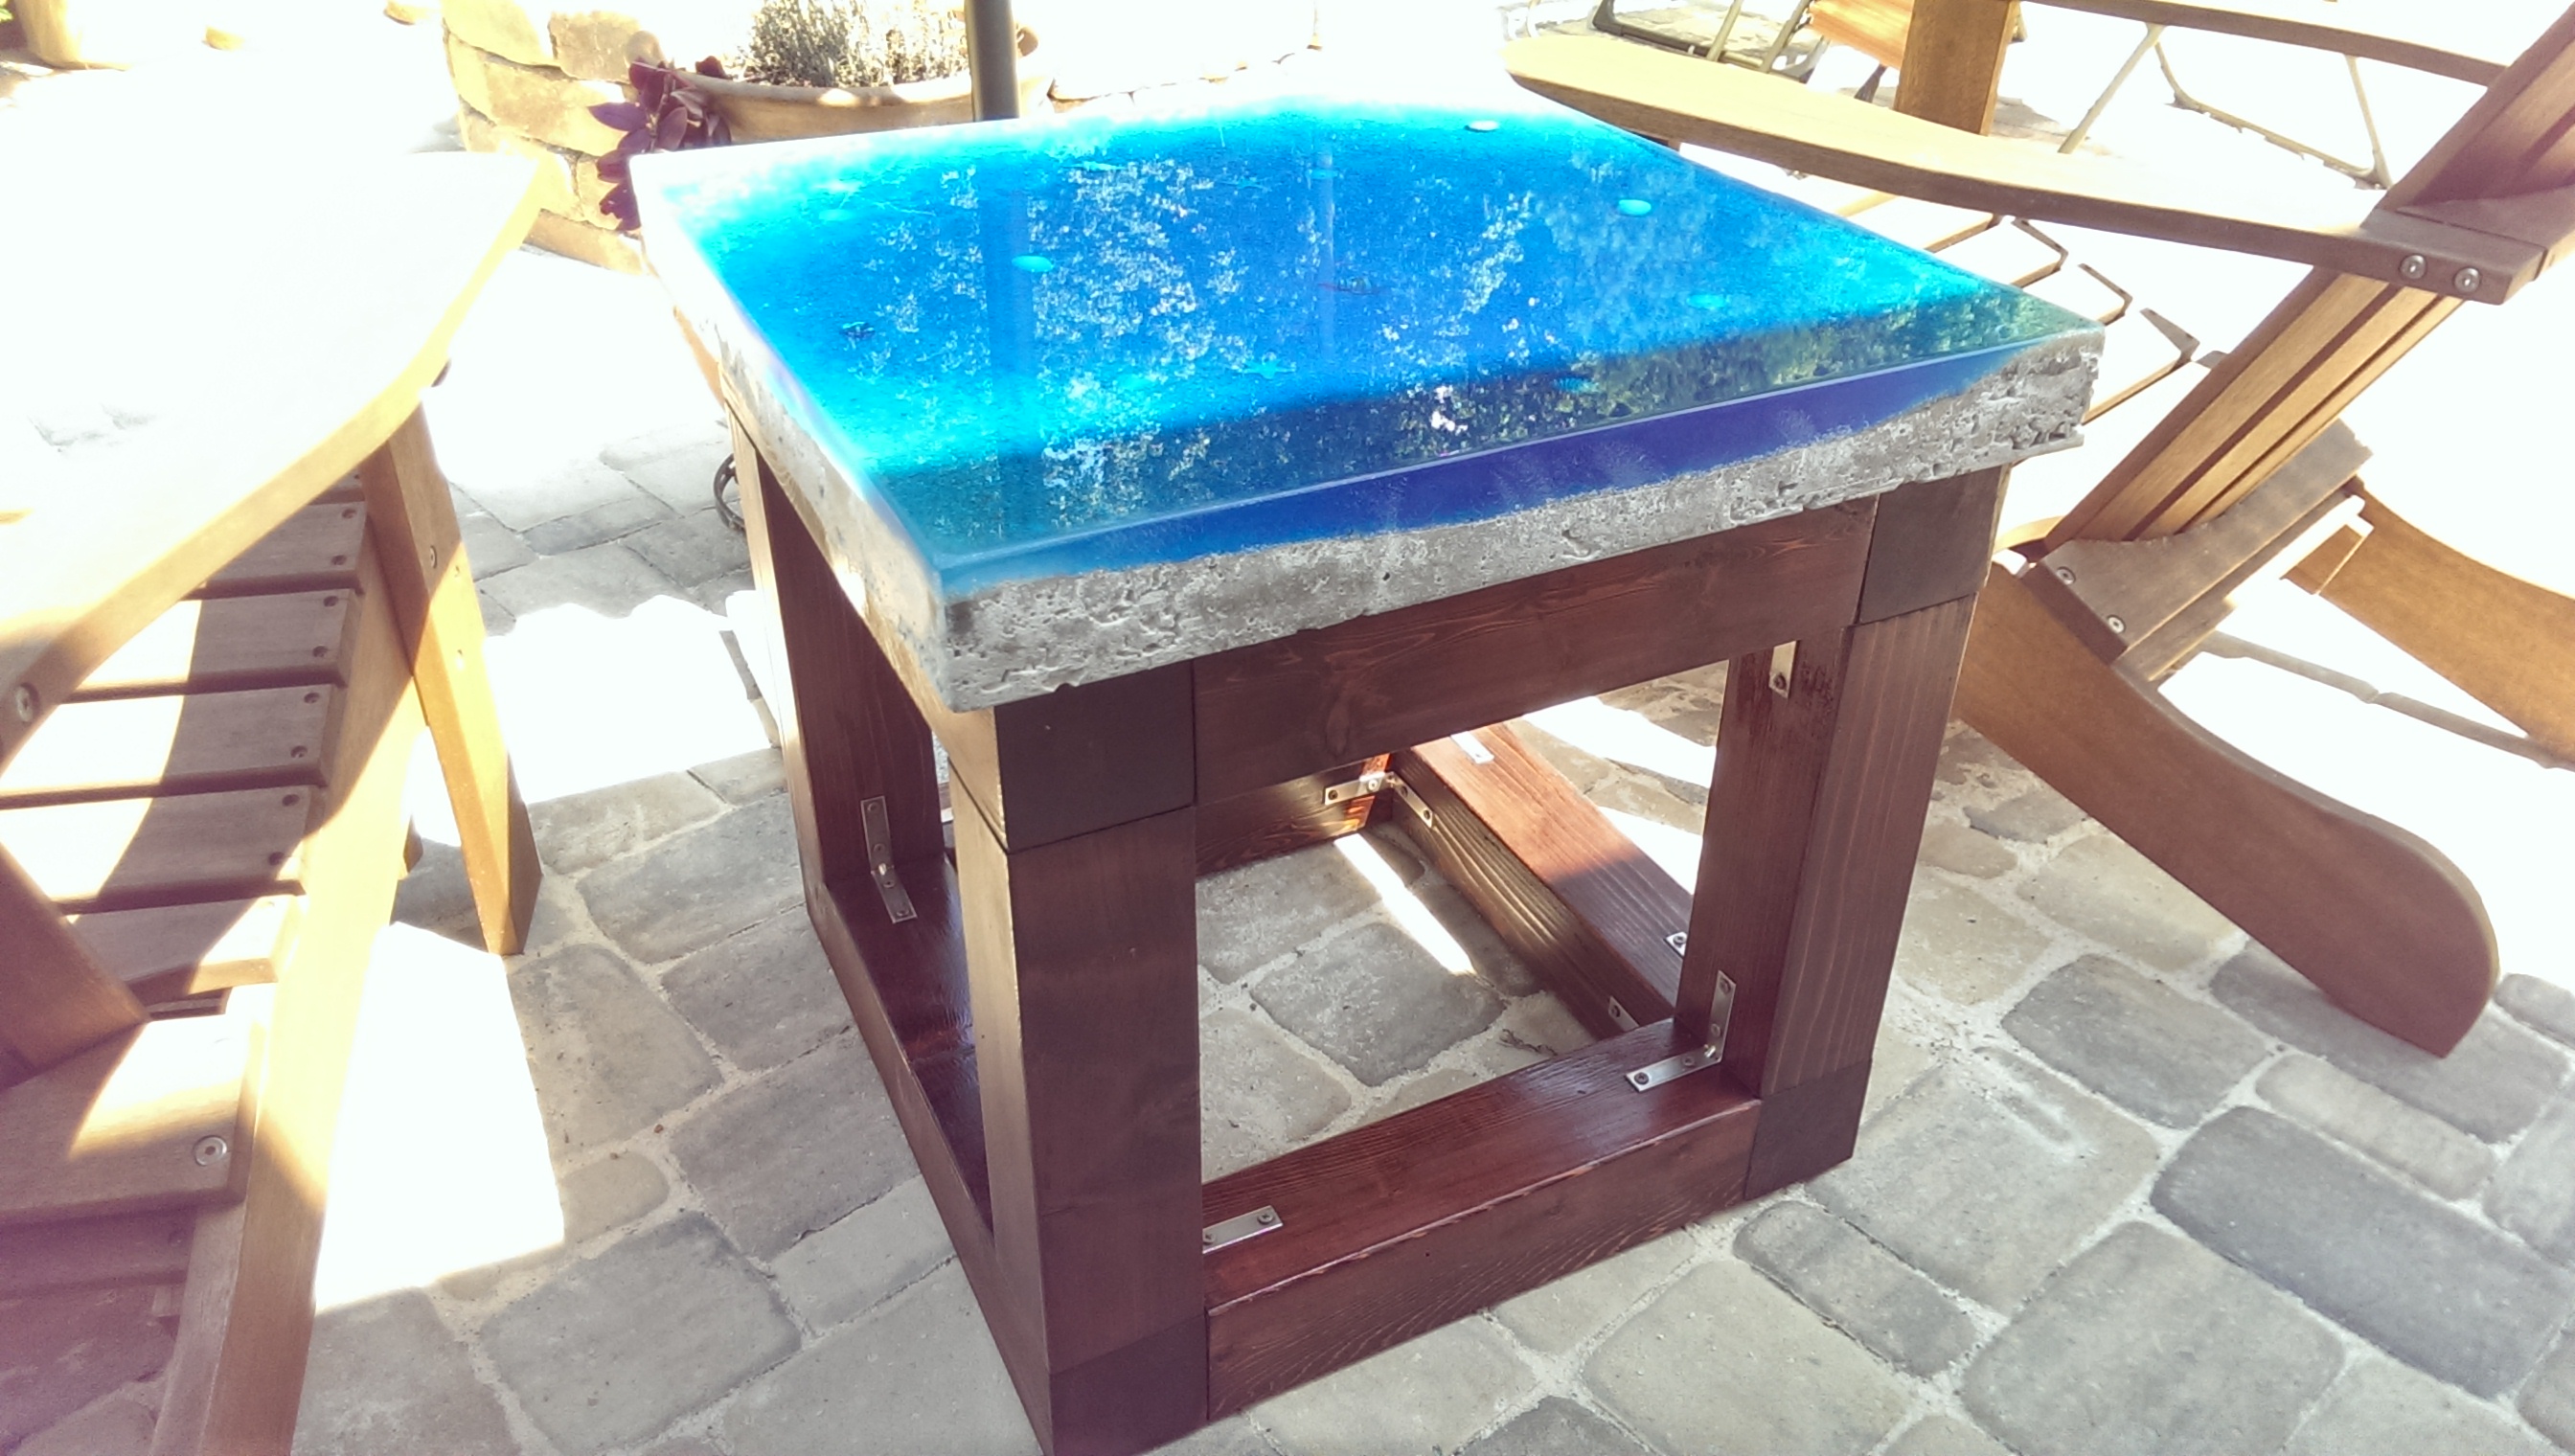
Originally, I had planned to make a cedar base joined by mortise and tenon. My lack of woodworking experience in that area lead to a change of plans. Instead of mortise and tenon joinery, I settled for what is essentially butt joints reinforced with corner braces. The final product was a joy to look at:
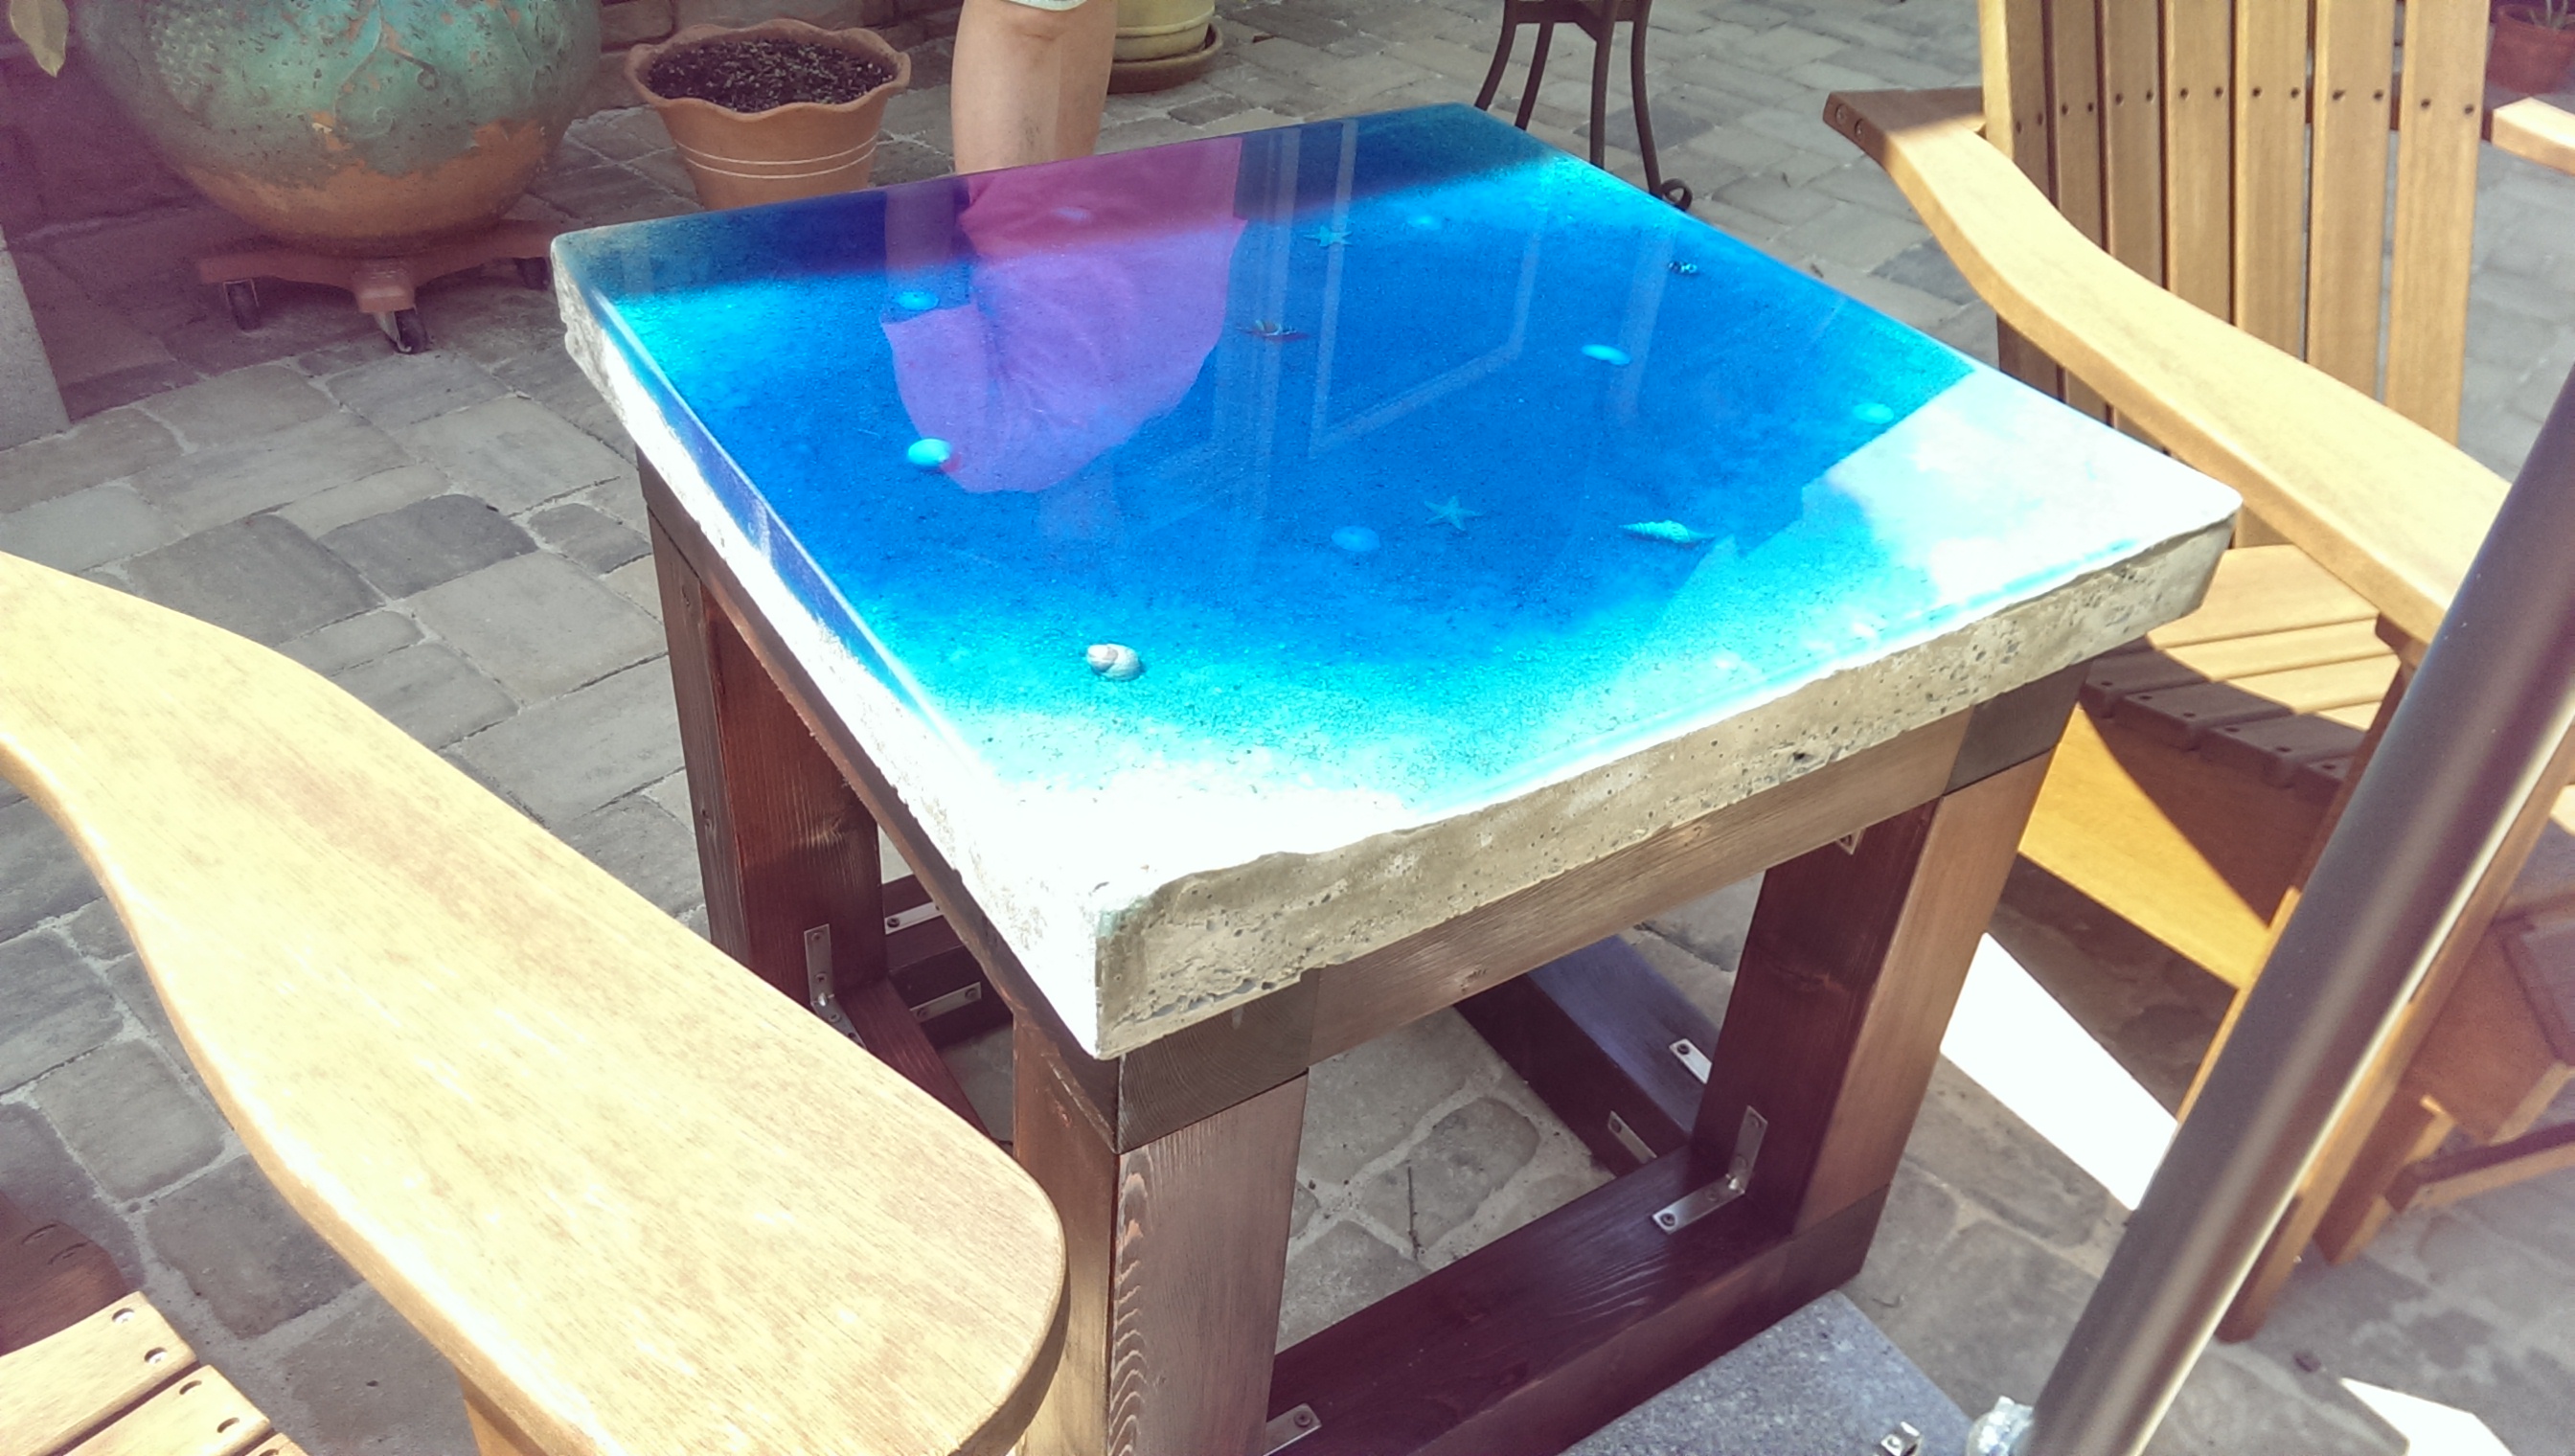
All in all, I am super-pleased with this project and I'd do it again in a heartbeat. In fact, since this table was a gift for my mother, I see a reprisal in the near future.